 Supplier Invoices
When a user receives materials for a specific work order–or into general inventory directly or against a purchase order–the user makes a record of the supplier and the invoice number. The result is that a supplier invoice is created, and will be available in the Purchases window. The initial status for a supplier invoice will be unposted . After reviewing and posting, it will go to accounts payable.
Watch the following video as a supplement to reading this article:
In this article, we explain how to:
Search invoices by supplier
Search for invoices not yet posted
Search for posted invoices
View and edit supplier invoices
Correcting discrepancies with a hardcopy Invoice
Post invoices to accounts payable
To manage supplier invoices: from the Home ribbon, simply click Purchases and then click Supplier Invoices in the left-hand menu.
There are many ways to search for invoices. Navigate to Home > Purchases > Supplier Invoices, specify your filters, and then click the Search button in the ribbon.
Below, we explain various ways to search for invoices using realistic examples: by supplier, invoices posted, or invoices not posted.
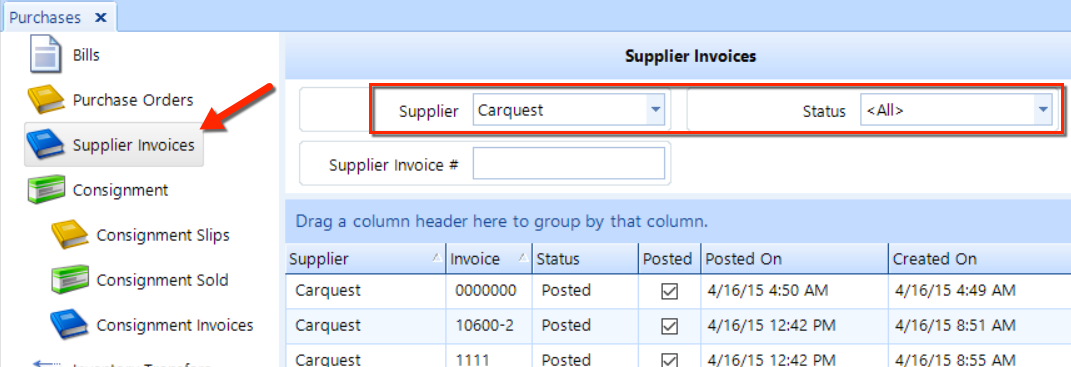
Follow these steps to search for all invoices or the Carquest supplier:
In the Purchases screen, click on Supplier Invoices in the left-hand menu.
Click the Supplier drop-down and choose Carquest.
Click the Status drop-down and choose All.
Click the Search button in the ribbon at the top.
| Start a new search: To begin an entirely new search at any time, click the Reset button in the ribbon to clear the filters and search results. |
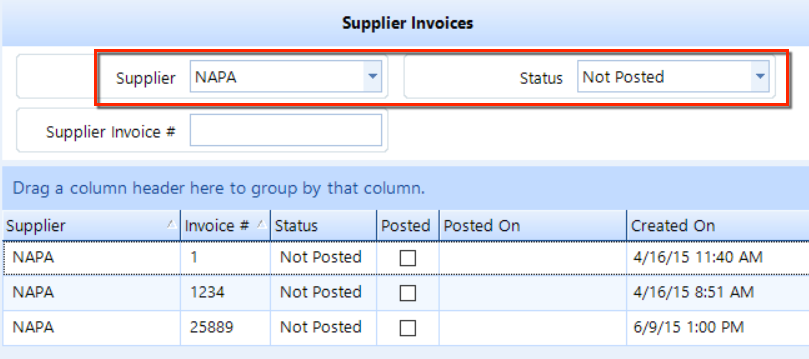
Follow these steps to search for all invoices not yet posted for the Carquest supplier:
In the Purchases screen, click on Supplier Invoices in the left-hand menu.
Click the Supplier drop-down and choose NAPA.
Click the Status drop-down and choose Not Posted.
Click the Search button in the ribbon at the top.
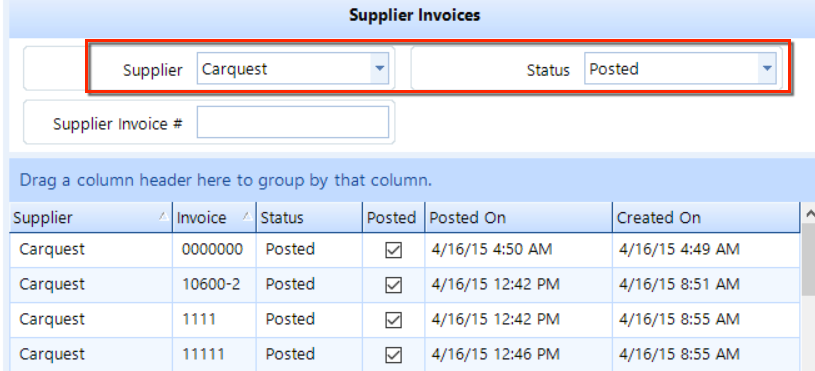
Follow these steps to search for all posted invoices for the Carquest supplier:
In the Purchases screen, click on Supplier Invoices in the left-hand menu.
Click the Supplier drop-down and choose Carquest.
Click the Status drop-down and choose Posted.
Click the Search button in the ribbon at the top.
To search by invoice number, enter the number in the Supplier Inventory # field and click the Search button.
| Search with part of an invoice number: You can enter only part of an invoice number, such as the last few digits. |
Here, we restrict the search results from the Carquest example above by entering some of the digits of an invoice number ("600"). In the figure below, the only invoice that appears in the search results is the one having an invoice number containing "600".

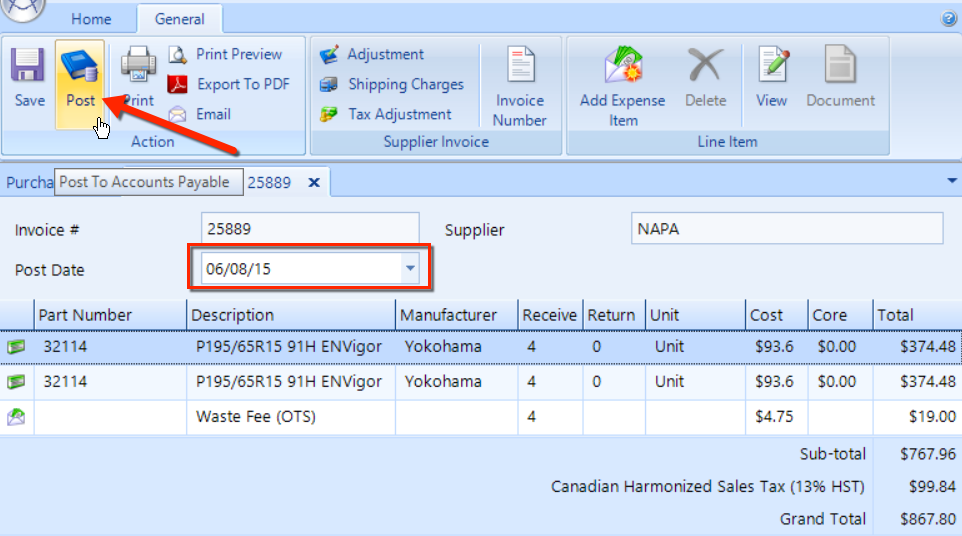
In the search results, double-click on an invoice to view the details. The figure below displays the details of invoice #25889, which we saw in the example for Search by invoices not posted above.
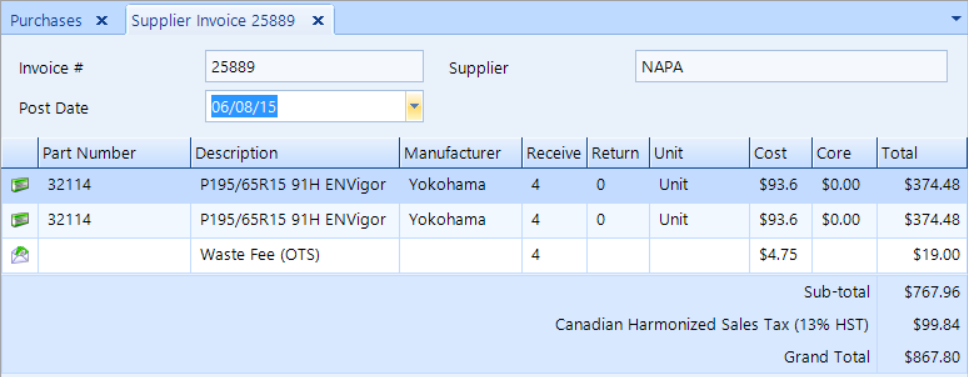
Click on any of the invoice items to see its details.
On the ribbon, you'll find several options for making changes to an invoice. We explain each of these below.

The invoice number may be incorrect because of a data entry error. To change the invoice number:
View the invoice details as shown above
Click the Invoice Number button.
Enter the correct invoice number and click OK.
Click Save to commit your changes.
Data entry errors also contribute to discrepancies with invoice items. Let's step through the most common examples, continuing with invoice number 25889 from above.
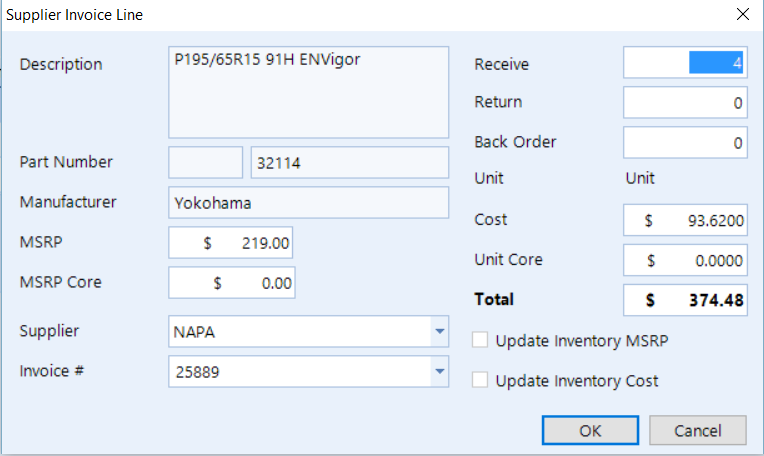
Double-click the first item in the invoice listing to see the detail pop-up. You can modify any item that appears in white, but you cannot modify any item with a light-grey appearance. Continue reading below to learn how many changes you can make from this small window.
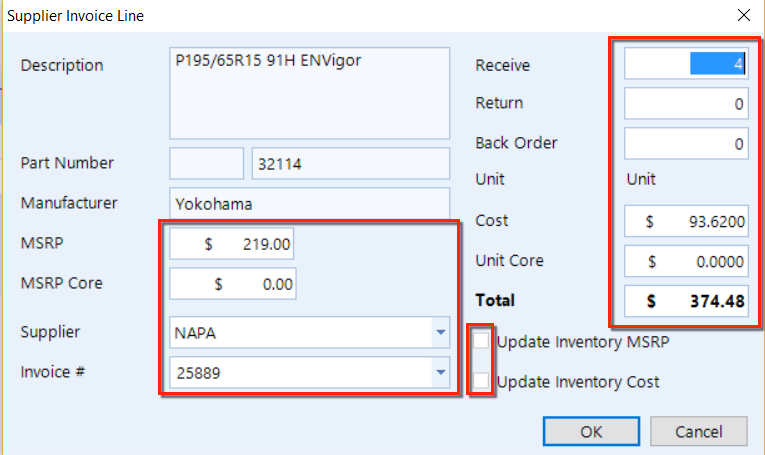
Maybe this item actually corresponds to another invoice. Click the Invoice # drop-down to see a listing of all invoices that have not yet been posted, and click the invoice number to which this item belongs. Click OK to close the popup and see that the item no longer appears in the listing for this invoice. You can return to Purchases > Supplier Invoices and search for this other PO to confirm that the item now corresponds to that invoice.
These are the conditions in which it's feasible to update the Cost of an item:
If inventory has been received, but none of the batch has been sold, then it's possible to change the cost–which will update the cost of the inventory batch accordingly. If some of the batch has indeed been sold, then you may not change the cost.
If an item is received to a work order that has not been posted, then you can simply update the cost. However, if the work order has been posted, then you can edit the cost. If a change to the cost is necessary for a work order that has already been posted, the change will cause a corresponding change to the cost of sales of the original journal entry when the work order was posted.
There may be issues updating costs if the location has set up a close date for their accounting period (Setup > Location Settings > General Ledger tab). An edit to the cost of an item may cause back-dated entries if an accounting period already closed since the item was received. If an attempt is made to retroactively adjust the item cost, then the system may raise an error and prevent it (because this would cause an entry prior to the close date). In this case, we recommend that you engage the bookkeeper or accountant and open the period to make the retroactive change. If the company books are already closed, a manual journal entry would be necessary to adjust the impact to the current period.
Changing other details: In our example, we could modify the Quantity Received the actual count is different. Or, we can change the Cost if there is a mismatch on the physical invoice. Also, you can change the Supplier, MSRP, and MSRP Core. Enter the Return amount if any items are damaged or otherwise unusable.
You may check either of the boxes to make system updates to Update Inventory MSRP or Update Inventory Cost.
After making any changes in this pop-up, click the OK button and then click the Save button in the ribbon to commit your changes.
A hardcopy invoice may contain one or more expense items that do not correspond to parts. Click the Add Expense Item button in the ribbon, make entries in the popup window, and then click OK.
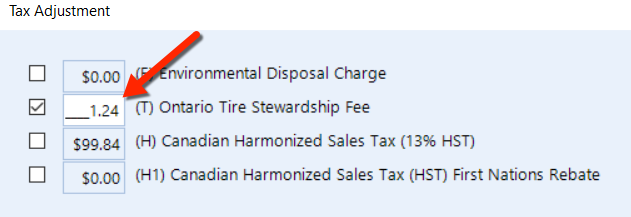
The invoice may show taxes that are due for one or more items. Click the Tax Adjustment button, check the appropriate box(es) in the pop-up window and enter the amounts. Click OK to close the pop-up.
Often, the shipping charges aren't known until the hardcopy invoice is received. Click the Shipping Charges button, enter the total amount in the pop-up window, and then click OK to close the pop-up.
If there are miscellaneous items on an invoice that don't correspond to any of the adjustments above, click the Adjustment button to enter the total amount of additional adjustments, and then click OK to close the pop-up. You can also use this function in the even that you need to adjust the invoice total to match the paper invoice without affecting any of the specific material items on the invoice.
A common problem in invoice verification is that an item is missing from the invoice listing but may already exist in the system. This is often the result of a data-entry error. To search for a part, click Utilities > Part Search. You can search by part name or number and restrict by date range.
These are the steps to search for an invoice, verify its details, and then post it to accounts payable:
In the Purchases screen, click on Supplier Invoices in the left-hand menu.
Enter the Supplier Invoice #, such as 25889.
Verify and adjust the Post Date as necessary.
Verify each of the items, the quantity of each, the totals, subtotal, tax and grand total.
If necessary, make changes such as we explain in the correcting discrepancies with a hardcopy Invoice section above.
After verifying that everything is correct, click the Post button in the ribbon at the top and click Yes in the popup window.
At this point, the invoice will be posted to the supplier accounts payable account. If no payable account has been setup for this supplier, then you will not be able to post the invoice. A pop-up window will appear, prompting you to Create a Payable Account–which is necessary before you can proceed with the posting.
