 Unit Conversions
The Unit Conversions modules gives you the ability to properly label any inventory that you sell in units that are different from the units in which you purchase them. For example, you may purchase a product that comes in a case of 12–but then sell them individually. Unit conversion can also take place right in the work order.
All inventory, unless a conversion has been put into effect, is purchased in units and sold in the units. So, if you sell engine oil on a work order, it will read 3.8 units by default. If you want the label to read liters or quarts, then you would set up a unit conversion.
| Applying the unit conversion: Once you establish your unit conversions, you will need to select the Unit Conversion from the drop down list and enter in the quantity in which you purchase the inventory in the Buy Factor field on the inventory material item. |
Watch the following video as a supplement to reading this article:
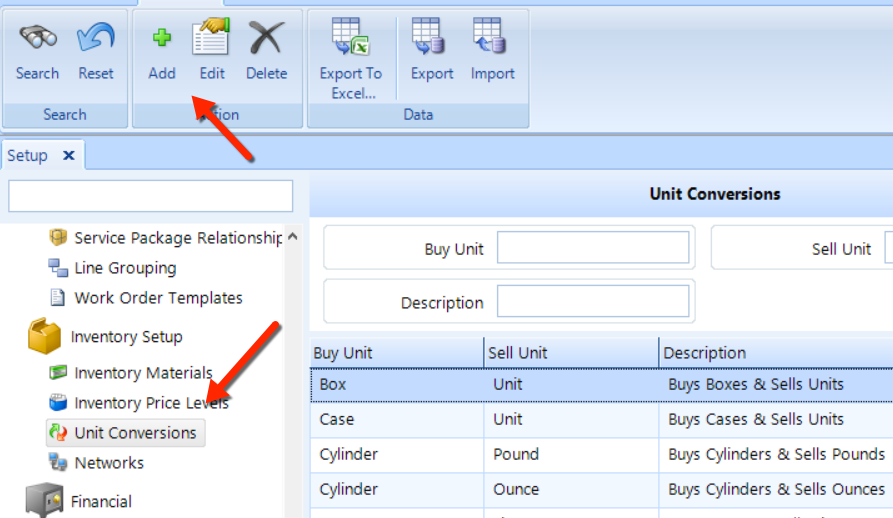
Click Setup in the ribbon and then click Inventory Setup > Unit Conversions in the left-hand menu.
Follow these steps to add or edit a unit conversion:
Access the Unit Conversions window, as we explain above.
To search for a unit conversion item, enter any optional search filters in the Buy Unit, Sell Unit, and Description fields and then click the Search button in the ribbon.
To Add a new unit conversion, click the Add button in the ribbon and then enter a Buy Unit, Sell Unit, and Description. Click OK.
To Edit an existing unit conversion, double-click and then edit the Buy Unit, Sell Unit, or Description. Click OK.

Access the Unit Conversions window, as we explain above.
To search for a unit conversion item, enter any optional search filters in the Buy Unit, Sell Unit, and Description fields and then click the Search button in the ribbon.
Click the unit conversion item in the list that you want to delete.
Click the Delete button in the ribbon, and then click Yes to confirm your choice.