Time clock events track time outside of attendance, work orders, and jobs on work orders. The time clock is useful for all of the tracking activities on which an employee spends time in any given day. After completing setup of the time clock according to the instructions in this article, continue in the Time Clock article to learn how to use the time clock.
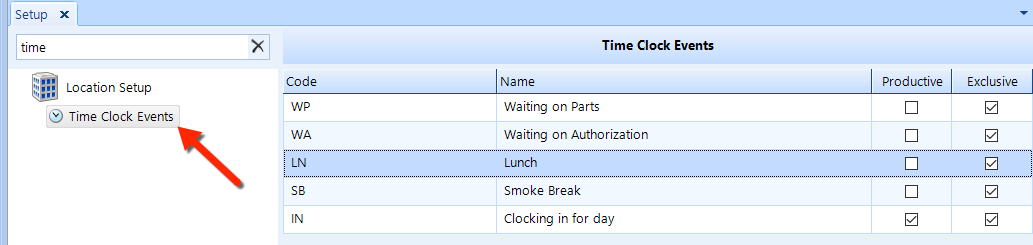
To access the Time Clock Events setup feature, click on the Setup button in the ribbon, then locate and click on the Time Clock Events item beneath the Location Setup node in the left window pane. See the figure below.
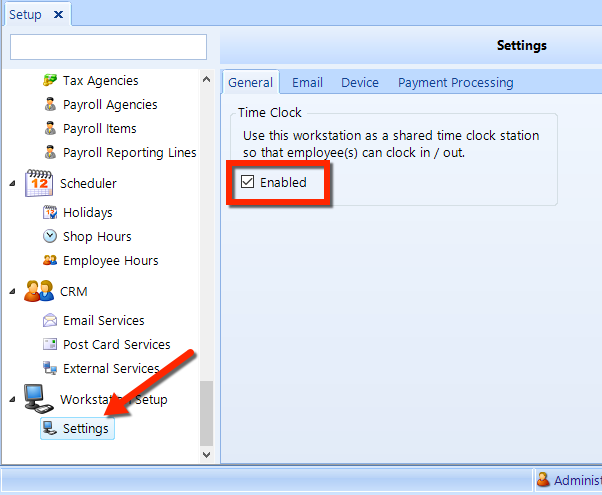
To enable a computer to function as a time clock for company employees, follow these steps:
Click the Setup button in the ribbon.
In the left pane locate Workstation Setup, and then click the Settings item.
In the right panel, check the Enabled box.
This computer is now available for use as a time clock.
Although it's unnecessary for a user to have general security permissions to use the time clock, there are various time clock permissions that you can configure for each user type. A user name is necessary to use of the time clock.
Follow these steps to :
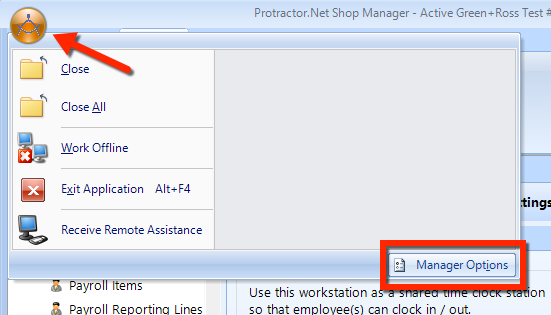
Click the Protractor icon in the upper left corner of the Shop Manager window.
In the drop-down menu, click the Manager Options button (see the figure below).
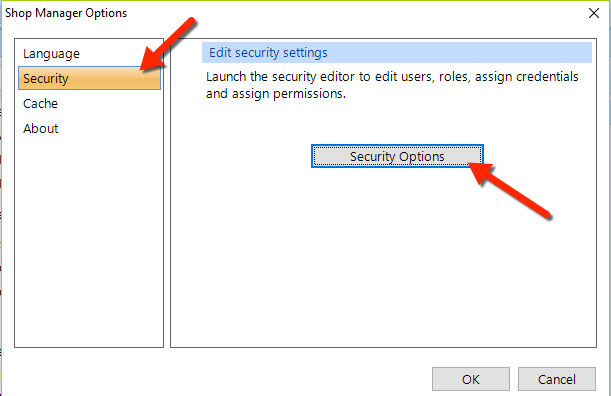
In the popup, click the Security item in the left pane, and then click the Security Options button.
In the next popup, click Roles in the left pane to view all of the user roles. Click on a user role, then click the Action drop-drop button, then click Properties (as shown in the figure).
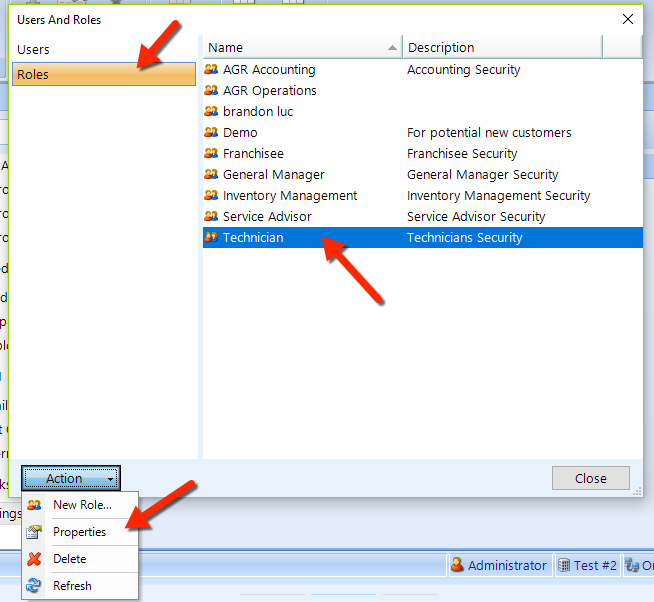
In the Roles popup, click the Permissions tab. Then scroll down in the listing to find the Time Clock item and double-click it.
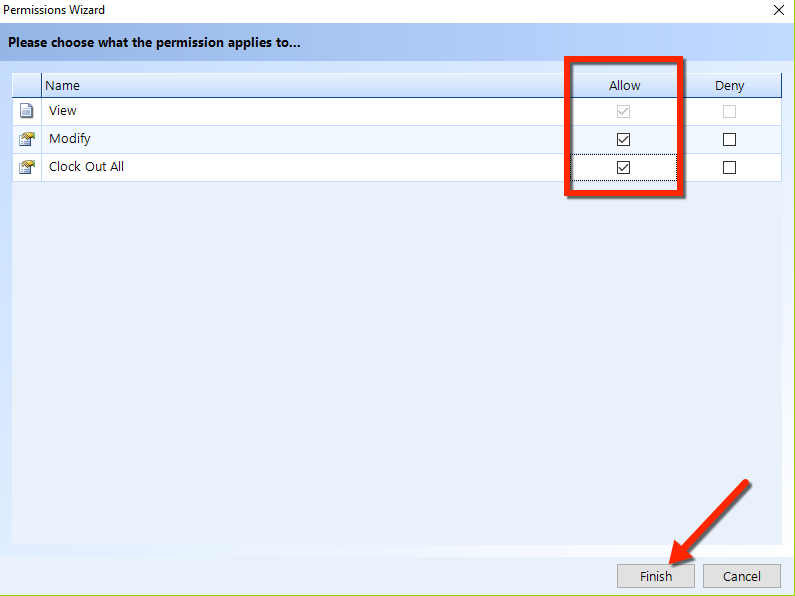
There are 3 permissions that pertain to the time clock:
View (for Technicians) - grants the ability to view the Timeclock button, and also to clock in/out of attendance, time clock events, work orders, and jobs.
Modify (for Managers) - grants the ability to edit time clock records. This may be necessary for various reasons, including the case in which an employee forgets to clock out when leaving for the day.
Clock Out All (for Manager) - grants the ability (for a manager) to clock out all users out of all events.
Follow these steps to rearrange the display order of time clock events:
Access the Time Clock Events feature, as given in the instructions above.
To change the list order, click on a time clock event and drag it to the position in the listing that you need it to be.
Click the Save button in the ribbon.
Follow these steps to add or edit a time clock event:
Access the Time Clock Events feature, as given in the instructions above.
To add a new time clock event, click the Add button in the ribbon.
To edit an existing time clock event, click on the event in the listing and then click the Edit button in the ribbon to open the popup window.
Enter the time clock Code and Name for this event.
Check the Productive box if time for this event is productive time. Placing a check in this box will impact reporting on time clock events–including technician productivity.
Check the Exclusive box if this time clock event is to be exclusive of other events. Anyone who clocks into an exclusive event cannot be clocked into another event simultaneously. Work order jobs are exclusive, by default.
Click OK to save your changes and close the popup window.
Follow these steps to delete a time clock event:
Access the Time Clock Event setup feature, as given in the instructions above.
In the listing, click on the time clock event that you need to delete.
Click on the Delete button in the ribbon.
Click Yes to confirm you want to delete the time clock event.