
Shop Manager includes a dashboard feature, which provides an at-a-glance view of various types of data. A dashboard consists of one or more widgets. Each widget is built upon a report, which you can then customize very much like the options available in the reports facility.
You can add, edit, and delete dashboards, and also arrange and configure the widgets on any dashboard.
To build a dashboard, you continue to add widgets that you can feasibly arrange on the screen. Continue reading below to see how to add and configure widgets, but first have a look at this example dashboard containing widgets that derive from several different reports. You can see two different types of charts and two different types of tables.
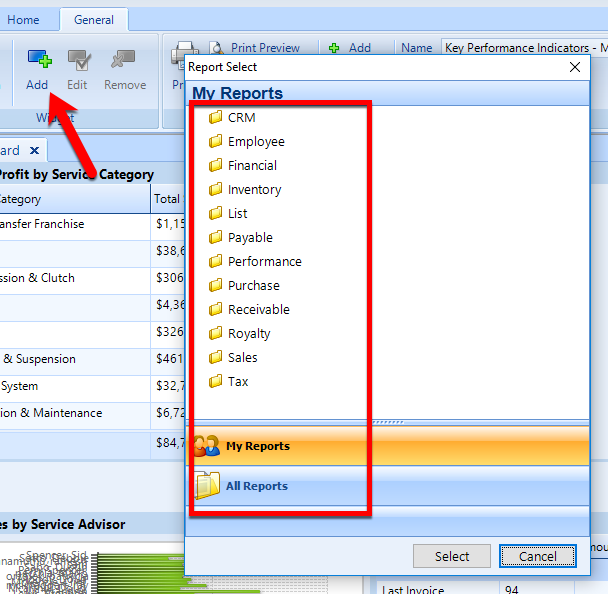
To add a widget, click the Add button in the Widget section of the ribbon, as shown in the figure below. In the popup, locate and then double-click to choose a report that will support this widget.
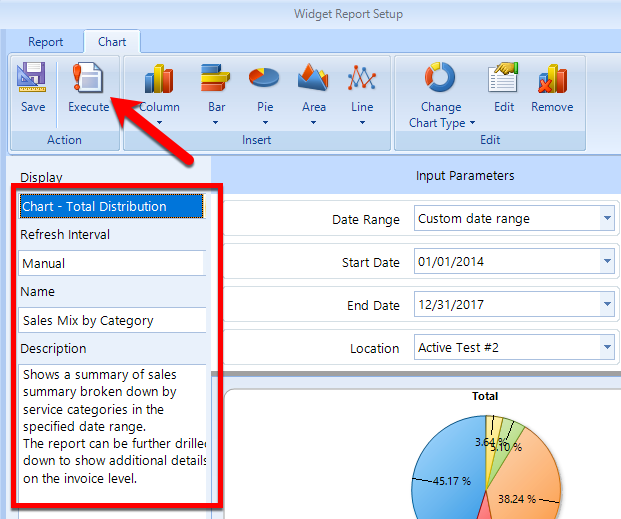
In the Widget Report Setup window, you can configure the listing with many of the basic and advanced features that are available for Reports.
Chart display: Click the Display drop-down to see if the report supports a chart view, and choose that option if that is what you prefer to see for this widget.
Report display: this is the default in the Display drop-down, you can configure the listing with the buttons in the ribbon.
Date range - use the date range filters to restrict the time frame for the listing.
Column Chooser - click this button in the ribbon to display the choose pop-up, then check / uncheck the boxes of the columns that you want to remove.
Reset columns - Click the Reset Columns button to return the listing to the default columns display.
Summaries - Click the Summary button in the ribbon to open the popup and use the Column and Type drop-downs to add summaries for the columns on which you do want summaries.
Sort a column - Sort on any column of data by clicking on it. Click the column again to reverse the sort on that column.
Click the Execute button in the ribbon and review the chart or report listing. When you happy with the results of your widget, set the Name and Description click the Save button in the ribbon to return to the dashboard and see the new widget there.
To move a widget, click and drag it to the new location. If you want to resize the widget, hover the mouse pointer over the border of the widget and drag it.
To edit a widget, click the small wrench icon on the widget. Or, click on the widget and then click the Edit button in the Widget section of the ribbon.
Choose a dashboard from the drop-down in the ribbon, then the Edit and Delete buttons in the Dashboard section of the ribbon to manage your dashboards.
From the ribbon (see the figure below), you can also perform a variety of printing and export functions:
Export the dashboard view to a PDF.
Send the dashboard view to an email address.
Print the dashboard view.
You can export or import the dashboard by means of an XML file. Click the Export button to provide the name of an XML file and save it to a location on your disk. Click the Import button to locate and import an existing dashboard XML file.
You can send a dashboard directly to another Shop Manager user. Click the Deploy button in the ribbon, and then choose the name of the user that is to receive the dashboard.