By providing an estimate, you can quickly give a quote to a customer without starting a work order. Save an estimate for future reference and, when the customer is ready, convert the estimate into a work order.
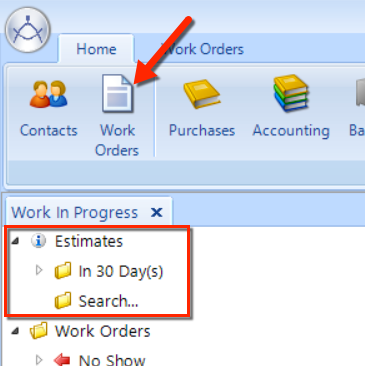
You can create and manage estimates in the Work Order feature. Click the Work Orders button in the Home ribbon. Estimates is the first folder in the left pane of the Work In Progress window (as shown in the figure below).
Expand the Estimates folder to reveal two subfolders, In 30 Days and Search. Click the In 30 Days subfolder to display a list of estimates that have been entered within the last 30 days–sorted from the newest to the oldest. Click an item to view a summary of the document in the right window pane, as shown in the figure below.
Double-click an estimate item to open and edit it, if necessary. If the estimate is no longer useful, click the Delete button in the ribbon (or right-click over the document name in the left window pane and click Delete in the pop-up menu).
To search for an estimate, double-click on the Search item in the left window pane to open a popup window. There, you can specify a date range by choosing a Start Date and an End Date, and optionally enter one or more search terms in the Search For field. The search terms can be any part of the contact or service item descriptions within the estimate.
To create a new estimate, click the top half of the Estimate button in the ribbon to start a typical estimate.
| NOTE: When you start an estimate from a template the behavior may vary from the generic instructions below as work order templates are able to be set to start at different entry points in the process depending on the options selected. |
In the Estimate window, you can create and change the contents of the work order. This estimate is convertible into a work order, which will eventually become the invoice that you present to the customer. In this article, we explain all of the estimate tasks that you can perform, including:
Delete Services
Reminder Items
Interval Services
Catalog Lookup
Inventory Lookup
Edit a estimate order line item
Delete a line item
Change the placement of a line item
Indicating a line item as a warranty item
Edit a Service Header or Footer
Assign a Service Advisor for a Line Item
Other Charges or Tax Adjustments
Notes
Reassign the Contact
Reassign a Service Item
View the Contact or Service Item Details
Print, Preview, Export, or Email the Estimate
Convert the Estimate to a Work Order
Before you can save an estimate it needs to have contact information associated with it. There are three ways to make that happen.
Click the Save button in the ribbon to save your changes.
Reassign the estimate to a new contact or service item:
Click the Reassign To command button in the estimate group of the ribbon.
The contact dialog opens and you can add a new contact and service item (optional).
Double click on the contact or service item to return to the estimate dialog.
Click the Save button in the ribbon to save your changes.
Assign a temporary contact or service item:
Type in a temporary contact / service item in the provided text box in the Tasks window pane located on the right of the screen.
It is recommended that you type in a name, phone number, and vehicle. This information will not be saved in the contacts manager but it is what will be used to search and retrieve the estimate in the future.
Follow these steps to add one or more concerns, inspections or services to an estimate:
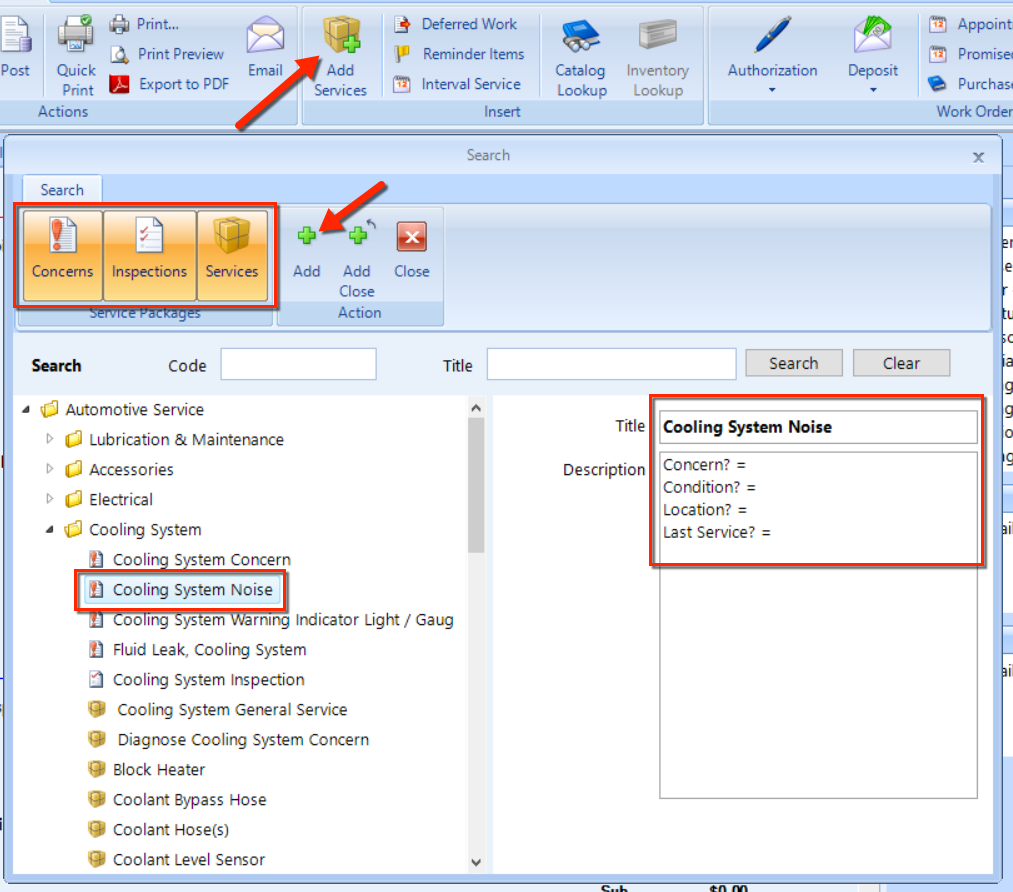
In the main window of a work order editor, click the Add Services button in the ribbon.
A wide array of concerns, inspections and services are available in the Search window (as shown in the figure below). Click any of the buttons to toggle their inclusion on or off .
Locate a concern, inspection, or services by searching for a Code and/or Title. Or, in the left window pane, navigate the tree by expanding the service category folders to reveal their contents.
Select the concern, inspection, or service by clicking on it. See the figure below. (The instructions continue below the figure.)
To edit the Title or Description, make any changes in the right window pane.
If need to add another concern, inspection, or service item, click the Add command button in the ribbon.
If this is your last item to add to the work order, click the Add & Close button in the ribbon to add the last item and close the Search window.
You may see a prompt to add related services, for which you'll find an explanation below.
When adding a concern, inspection, or service to an estimate, you may get encounter a prompt to add one or more related services, which are setup in the Service Package Relationships settings of Work Order setup. Related services are additional inspections or services that could be sold in addition to or as a replacement for the service that an advisor has chosen to include in the work order.
When adding a concern, inspection, and/or service to a work order that has a service package relationship, the Related Services window open and present three types of related services:
Optional – You can choose whether or not you wish to apply these to the estimate, in additional to your original item
Replace – choose this type to replace the original item with the related item.
Required – such items are mandatory, and will automatically be put into the estimate along with your original item.
Select any of the related items that you want to use by checking the box in front of each item in the list, and then click the OK button.
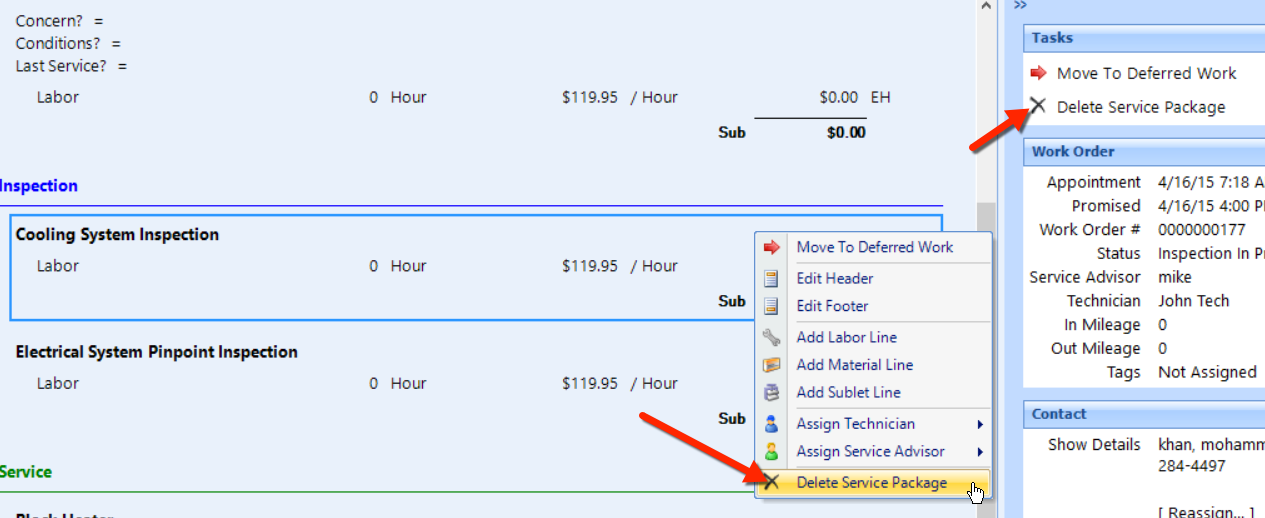
There are two options for removing a concern, inspection, or service item from an estimate:
Right-click on the item and choose Delete Service Package from the popup menu.
Click once to select the item, and then click the Delete Service Package, and then click the Delete Service Package task in the top of the right window pane.
Reminder items are either services packages or inspections that should occur at specific time and/or mileage intervals. They are customizable, though these reminder items are not necessarily reflective of the OEM service intervals. Reminder items appear in listings with the item name, the last service date, and the date and/or mileage they are due. Red flags indicate the item is past due, yellow flags indicate the item is coming due soon, and green flags indicate the item is not due.
For the mileage basis, Shop Manager uses the values in the In and Out mileage fields in the Work Order pane (see the figure). Double-click to edit either of these mileage values.
If you are preparing an estimate, the Reminder Items button will only be available if a service item has been added to the estimate.
Follow these steps to add a reminder item or group:
Click the Reminder Item in the ribbon, as shown in the figure below.
In the Reminder Item pop-up window, click the Action drop-down button, and then choose Add as shown below.
To see all reminder items, click the Search button.
In the popup window, enter a partial or full reminder item Name. Optionally, enter in a full or partial Description
To begin a new search, click the Clear button and then steps above.
Click on the reminder item or group you want to add. Reminder groups contain an icon of multiple flags; items have only one flag.
Choose multiple items by holding down either the CTRL or SHIFT key when selecting.
Click the OK button.
If you are adding a single item, you'll need to choose the interval for the service item. There is an option to change it to a custom value later, if necessary, using the edit feature. Click the OK button.
If you are adding multiple items, a list of reminder items and their corresponding intervals will appear. Set the appropriate intervals for the service items. To change an interval, hover your mouse at the far right of the interval box and a small drop-down list arrow will appear.
Click on the small drop-down arrow and select the interval you wish to use by clicking on it.
Repeat the steps above for each reminder item, and click the OK button when you're done.
In the Reminder Item popup window, right-click the service item that you need to edit. (Or, click the Action drop-down button and choose Edit.)
In the Reminder Interval popup, choose the Type from the drop down list.
Choose Periodic if the service item occurs at regular mileage or calendar intervals. Check the Time Interval if this is a calendar-based service, and then choose days or months in the drop-down and enter a value in the field. Check the Usage box and enter a value for the mileage interval.
Choose Fixed Date from the Type drop-down if the service item is to be performed on a specific day annually, then choose a Date, and then enter a value for the number of times to repeat the service in the Interval field.
Click the OK button to return to Reminder Item popup window.
To delete a reminder item, do the following:
Select the reminder item you wish to delete by single clicking on it.
Click the Action button drop-down and then click the Delete list item.
Follow these steps to include a reminder item in work order:
Double click on the item you wish to add to the work order, and review the list of services packages and/or inspections that will satisfy the reminder item.
Double-click on the item you want to add to the work order. If this item has any relationships, you'll see a popup window asking you to choose and confirm the related items.
Choose the items you want to add to the work order by checking the box to the left of each item. Some items may not be optional and the check box for these will be uncheckable.
Click the OK button.
Repeat the process above for each item you wish to add to the work order.
If the customer had the service performed somewhere else, you can remedy it so your service records are updated even though you didn't sell it.
Follow these steps to apply a remedy:
Select the reminder item you wish to remedy by single clicking on it.
Click the Action drop-down button and choose Remedy.
Select or enter the Date the service was performed using the calendar combo box.
Enter the Usage (typically mileage) value.
Optionally, enter a Note about the item and then click the OK button. The notes entered do not appear on any customer documentation but it does appear on the service items history when you hover the mouse over it.
Select the appropriate service from the list by clicking on it.
Click the OK button.
Interval Services are inspections and services that Original Equipment Manufacturer (OEM) recommends for specific mileage intervals.
For the mileage basis, Shop Manager chooses an interval according to the values in the In and Out fields in the Work Order pane (see the figure). Double-click to edit either of these mileage values.
Follow these steps to add an interval service to the estimate:
Click the Interval Service button in the ribbon.
Click the Normal option to display the service intervals for normal operating conditions; click Severe to display the service intervals that pertain to severe operating conditions.
Left Arrow Button - At the lower right of the window pane, there is a blue left arrow button that allows you to return to the vehicle information and make any changes.
Choose an Interval from the drop-down list, as shown in the figure.
Review the listing to see the type, description and comment for each service item.
There are two tabs. Click the As One Service to see the service items as a collection that has a single value for labor time (Hours). To add the entire interval to the work order as one service, check the box in the Type column, and then click Add button in the lower right of the popup window.
To select individual service items, click the As Multiple Services and click the box in the Type column for to each item that you want to include and click Add button.
Repeat these steps for each service item you need to add.
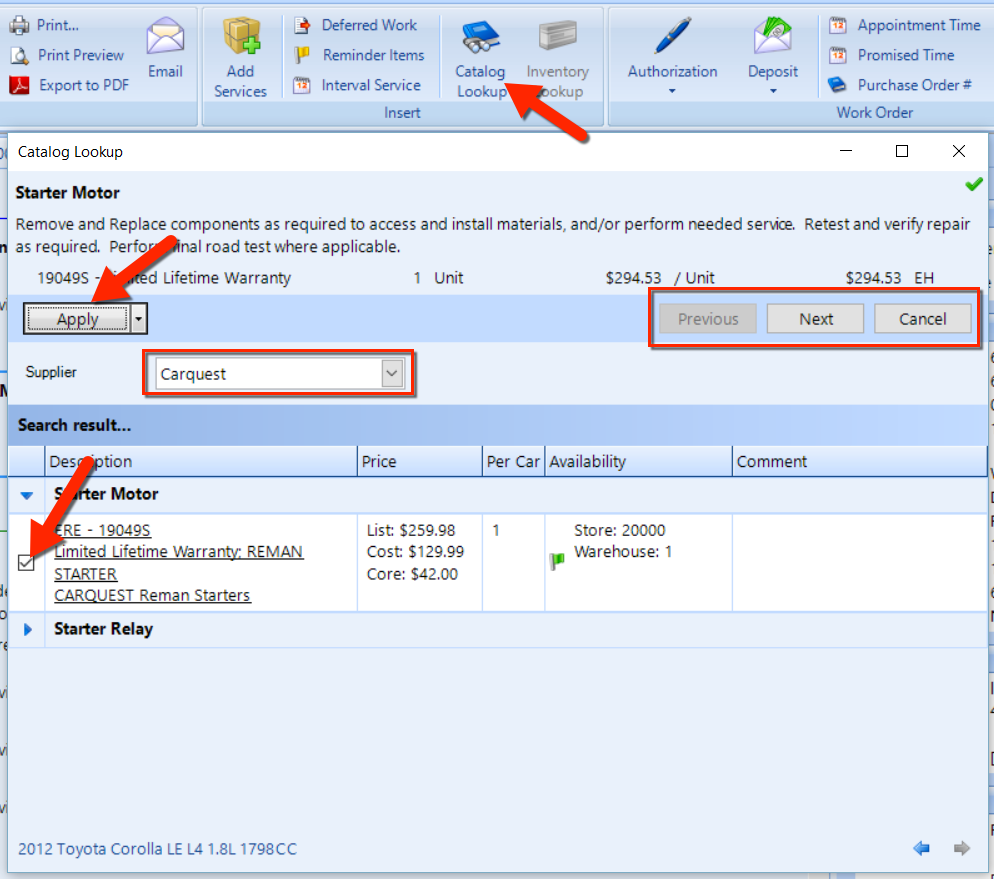
Follow these steps to perform a catalog lookup:
Click the Catalog Lookup button in the ribbon, as shown in the figure below.
Click the Next and Previous buttons to traverse the parts/items in the estimate.
Choose a different Supplier to see if that supplier offers an equivalent part/item, perhaps for a better price.
Check the box(es) in the listing to choose a part/item.
When you're done, click the X in the upper-right to close the popup window.
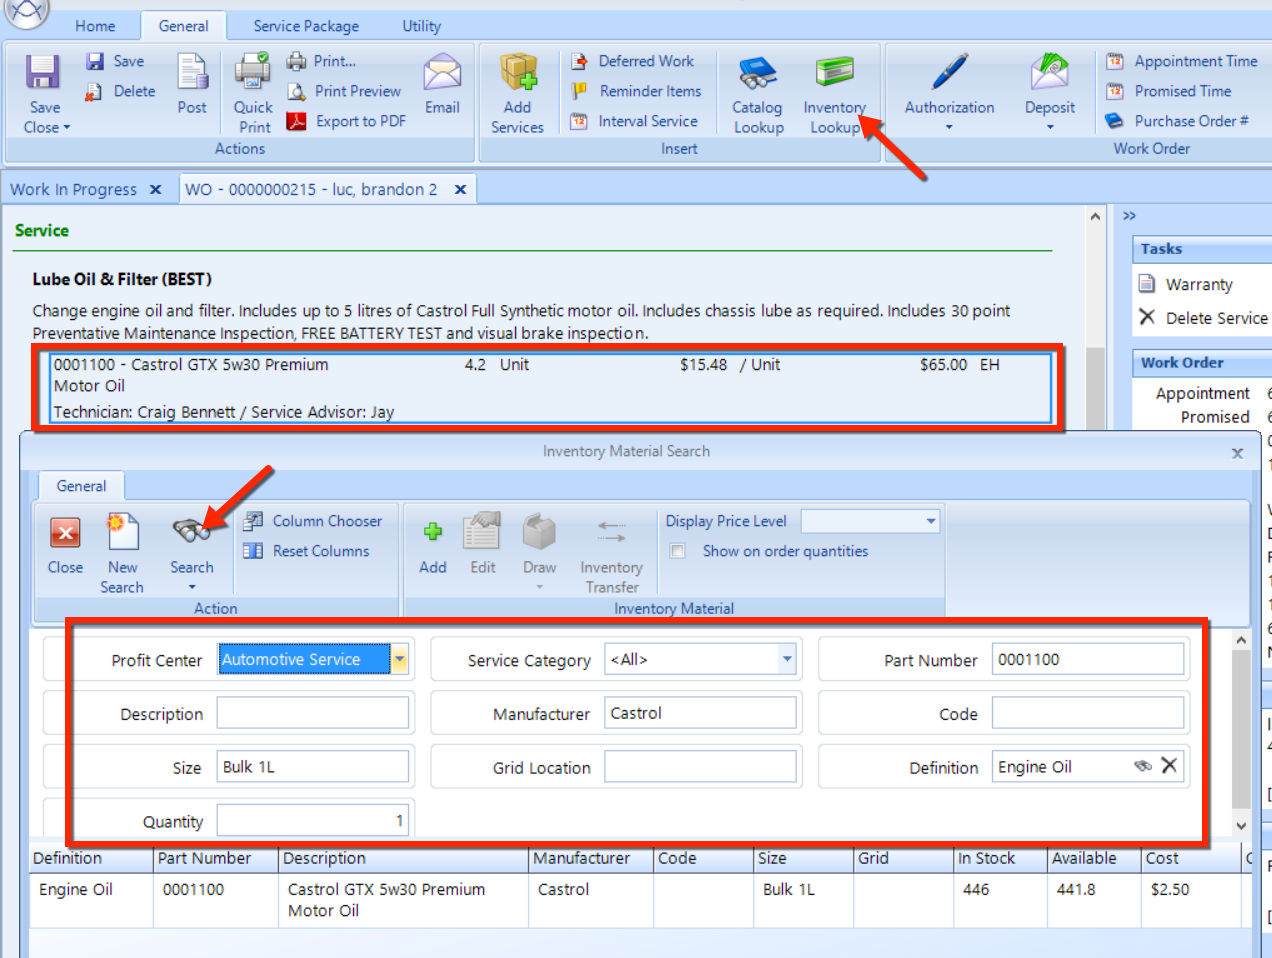
Follow these steps to search inventory for a part:
Click a part in the main tab of the work order, as shown in the figure below.
Click the Inventory Lookup button in the ribbon.
Perform an inventory search using various options in the Inventory Material Search popup window. See the Inventory Management article for instructions on how to perform an inventory search.
A work order may contain a number of line numbers for parts, labor, or other service items, as we show in this figure:

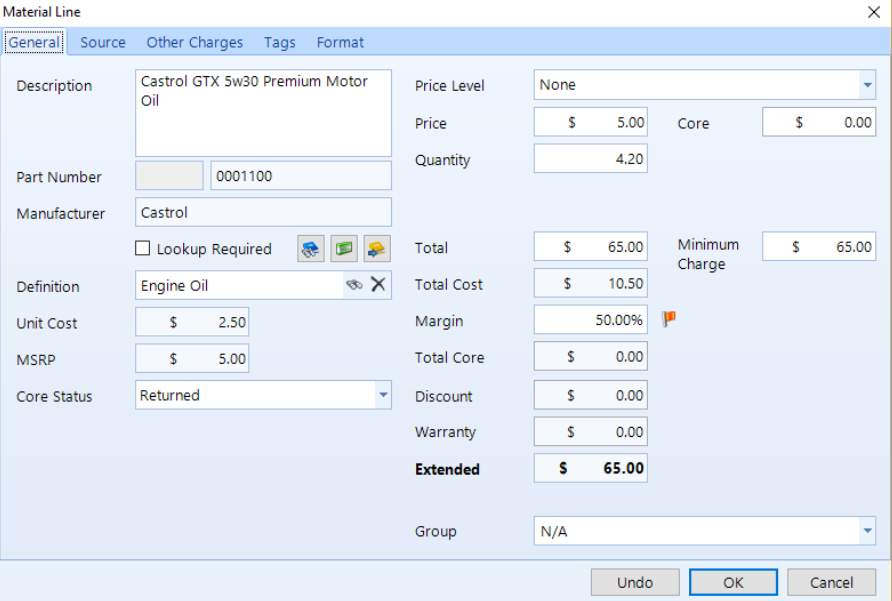
There are two methods for editing a line item within the estimate window:
Simply double-click a line item in the main estimate tab, or
right-click on the line item and then select Properties from the popup menu.
The Material Line item popup window will appear, as seen in the figure below.
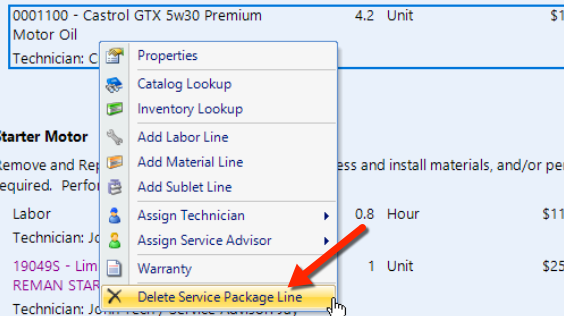
To delete a line item, right-click over the item and choose Delete Service Package Line from the popup menu.
You may need to move a line item to a new location in the estimate–either within the same service category or to an entirely different service category. To move a line item, simply click, hold, and drag-and-drop the item to the new location and then release the mouse button.
To cancel the move, press the Escape key on the keyboard before releasing the mouse.
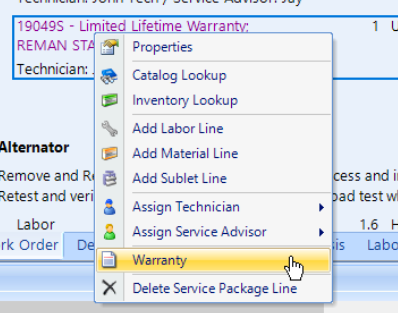
To add a warranty to a line item, right-click and choose Warranty from the popup menu. Read the Warranty article to learn more.
Most services have a descriptive header, which you can edit to your liking. To edit the header, right-click and choose Edit Header from the popup menu. Similarly, you can edit the footer by right-clicking and choose Edit Footer from the popup menu.

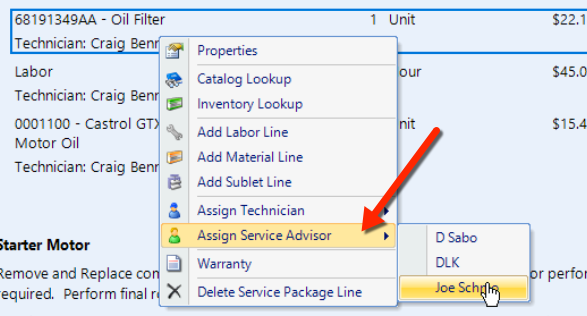
To change the service advisor for a line item, right-click and choose Assign Service Advisor from the popup menu, and then choose the name of the advisor.
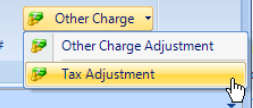
Use the Other Charge button drop-down in the ribbon to make a tax adjustment or other adjustment. Read about taxes and adjustments in the Taxes article.
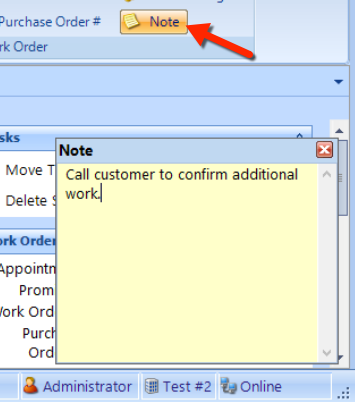
Estimates may include notes, which are for internal use only and do not appear on any customer documentation. To view or edit work order notes, click the Note command button in the ribbon.
Follow the steps below to reassign an existing estimate to a new or existing contact:
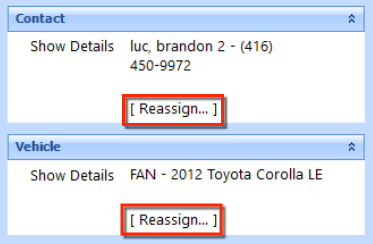
Find the Contact panel on the right side of the Work Order window, and click on the Reassign link (as shown in the top of the figure below).
Using the instructions that are given in the Contacts article, search for a new contact in the popup window.
Click the contact to select it, and then click the Select button in the ribbon to close the popup.
Follow the steps below to reassign an existing estimate to a new or existing contact:
Find the Contact panel on the right side of the Estimate window, and click on the Reassign link (as shown in the bottom of the figure above).
Using the instructions that are given in the Contacts article, search for a new service item in the popup window.
Click the service item to select it, and then click the Select button in the ribbon to close the popup.
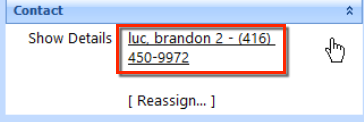
To view the details for the contact on this estimate, simply click the contact link in Contact panel as shown in this figure:
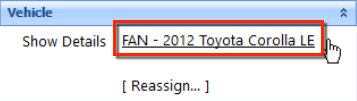
To view the details for the service item on this estimate, simply click the contact link in Vehicle (service item) panel as shown in this figure:
At any time you can print, print preview, export, and email an estimate. Below, we explain how to perform these tasks from the ribbon.
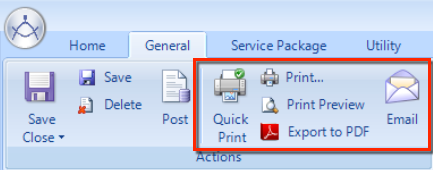
Click this button to print work order document according to the Template that you select in the drop-down. No other options will be given in this quick print feature. See the next section if you need more options for the printer, properties, page range, or number of copies.
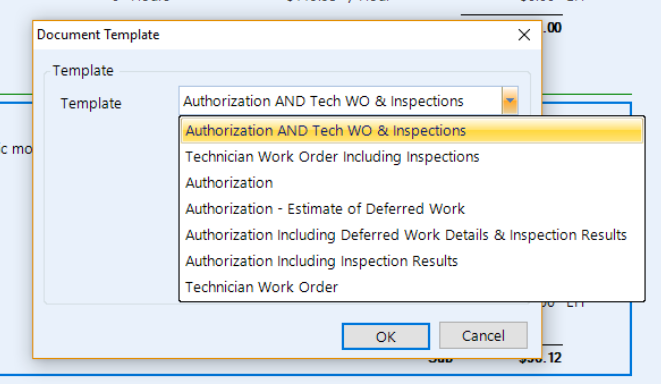
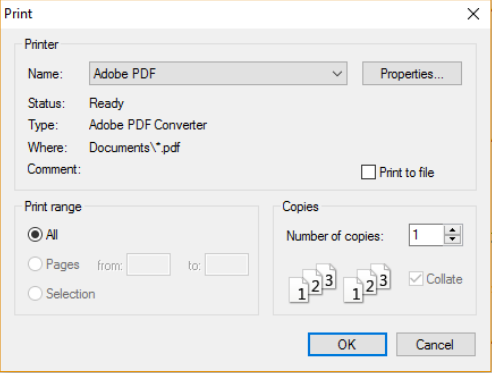
After choosing a Template (identical to Quick Print above), you have options to choose the printer, properties, page range, or number of copies.
With this feature, you first choose a template as we explain above. Then, a Print Preview popup window will appear–in which you can examine how the document will appear when it prints. Within the popup window, you'll find options for viewing and zooming the preview, and navigating among the pages of the document. You can also adjust document properties including the margins and orientation. When you're ready, you can print specific pages or all pages, and then close the Print Preview window.
Click this button to choose a template and then export the document to an Adobe PDF file. Remember to give the file a distinctive name and place it into a folder in which you can later find it.
Click the Email button to email the document to a recipient and automatically attaches a file to the email in the Adobe PDF format.
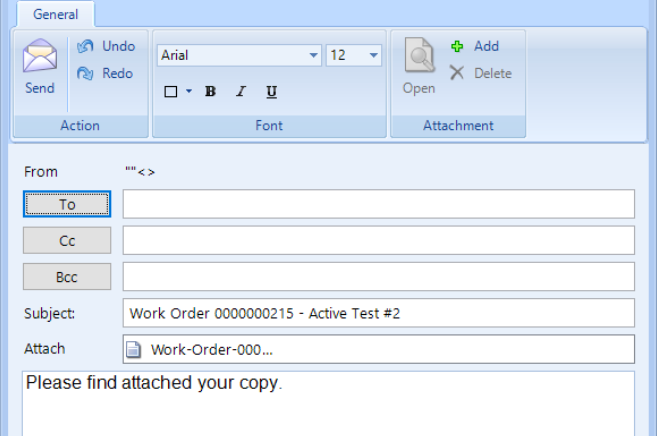
Follow these steps to send an email containing a PDF of the document:
Enter a To email address for your recipient. See the figure below.
If necessary, add email addresses in the CC and BCC fields.
Edit the Subject, if necessary.
Notice the file in Attach field. You can double-click this file icon to verify it is the correct document.
Edit the body of the email message, using the Font buttons to change the appearance of the text, and using the Undo and Redo buttons to optimize or correct your edits.
To send the email, click the Send button in the button.
Follow these steps to convert an estimate into a work order:
Click the Convert To Work Order button in the ribbon.
Click Yes at the prompt to confirm that you want to convert this estimate to a work order.
You'll receive a prompt to enter any missing information that is missing from the estimate– such as a contact or service item. Choose a contact and/or service item, as necessary.
After successfully completing the steps above, the estimate becomes a work order and will appear in the appropriate work order folder.