A general ledger account is an account for sorting and store balance sheet and income statement transactions. Examples of general ledger accounts include the asset accounts such as Cash, Accounts Receivable, Inventory, Investments, and Equipment. In this article, you'll find explanations on how to manage your ledger accounts. If you haven't already, it's essential that you setup your general ledger.
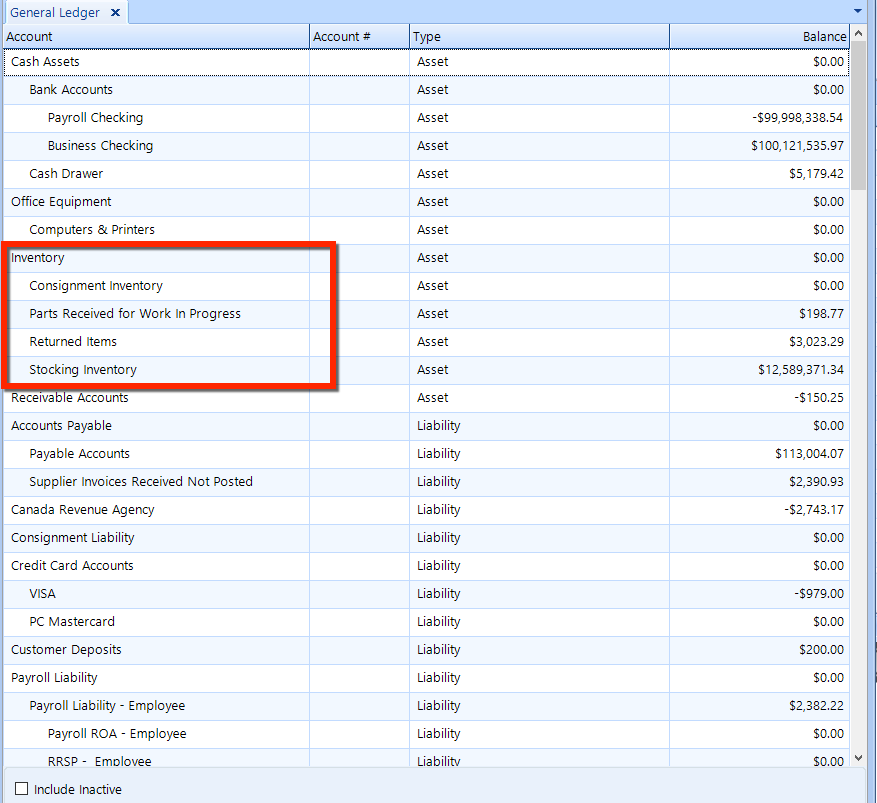
To access the general ledger, click the General Ledger button in the ribbon. The chart of accounts will appear in the listing, as shown in the figure below. Assets are shown at the top, followed by liabilities, equity, and expenses.

See the Ledger Accounts Setup article to add new general ledger accounts.
The general ledger contains both parent and child accounts, as seen in the Inventory parent account in the figure above. You can also learn how to manage parent and child accounts in Ledger Accounts Setup.
Many Shop Manager tasks will automatically enter transactions into the general ledger, but there may be times when you need to enter a transaction manually.
NOTE: During the initial interactions with Shop Manager, a common entry is an opening balance transaction. We will use this as the example in the instructions below. |
Follow these steps to manually enter a transaction:
Access the General Ledger as given in the instructions above.
Click the New Transaction button in the ribbon.
First, set the transaction date. If, for example you are entering an opening balance for a date in the current month, then you may want to set the transaction date to be the last day of the previous month.
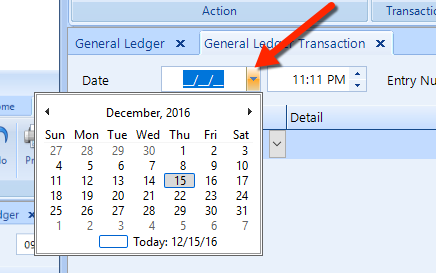
Optionally, enter a Time and Entry Number (which is auto-generated, but you can edit it if necessary).
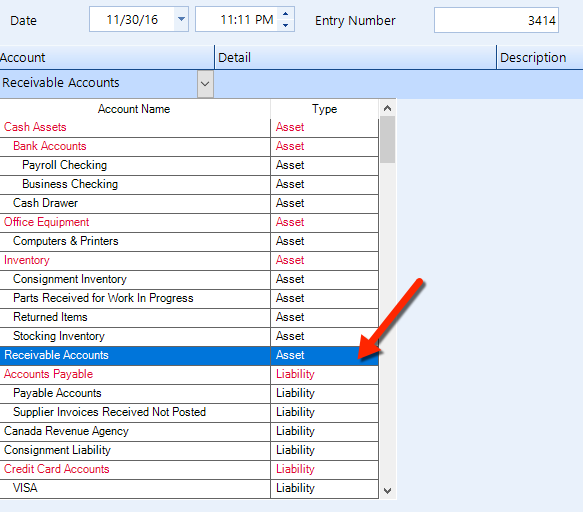
Click the Account drop-down to display the chart of accounts. Click the account against which you are entering this manual transaction. In the figure below, Accounts Receivable is chosen.
Click in the Description column. In our example, Accounts Receivable has been chosen, so a popup window appears–in which a sub-account should be found and chosen.
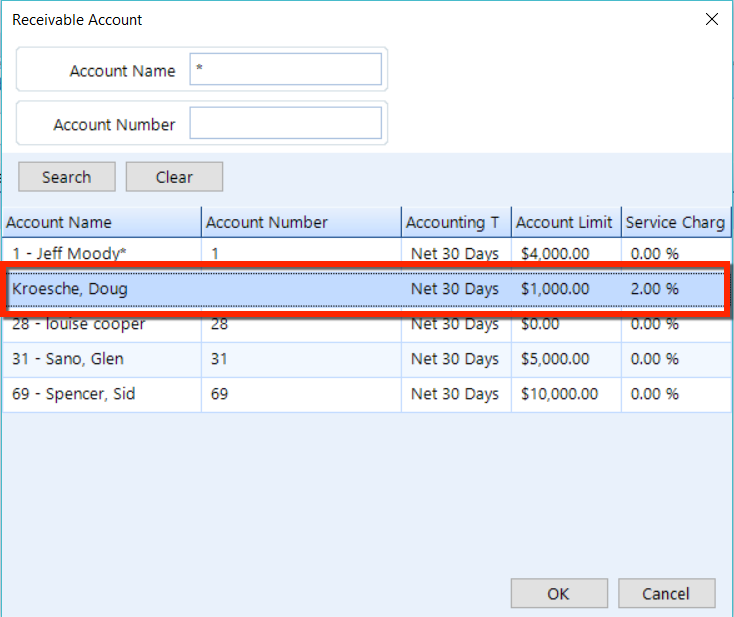
Click OK and the sub-account information will appear in the Detail column of the transaction listing.
The default method for enter the transaction amount is debit/credit. To change this method, check the Single Column check box at the bottom of the transaction window as shown in the figure.
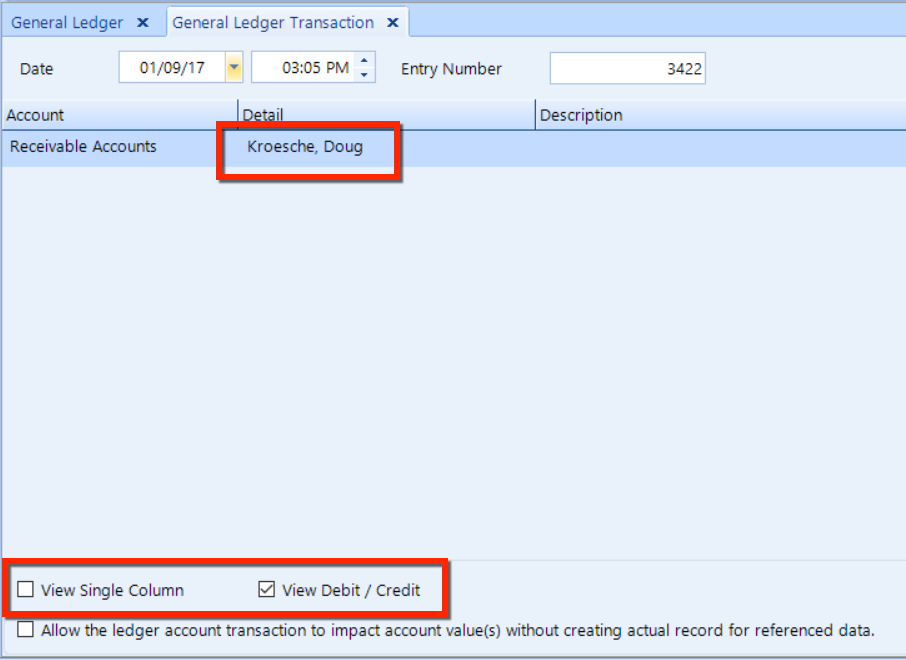
Single column: If you check the Single Column box, the Debit and Credit columns will be replaced by a single Amount column. In this view, a transaction that adds to this account would be positive, while a transaction that subtracts from the this account would be negative. |
Enter the amount for the transaction, either in the Debit or a Credit column. For our opening balance example, we have an amount of $237.87 that was owed on the last day of the month. Since this is a receivable account–which is a debit account–this amount would be entered in the Debit column.
You will receive a prompt enter a balanced transaction by opening the Account Name drop-down on the next line of the transaction.
Here's a tip for convenience: after entering an amount (credit or debit), you can press the Enter key to start another line.
You can enter other line items, including an offsetting/balancing items. See the figure below for an example.
Balanced transactions: Each transaction must balance: the total of the Debit column must equal the total of the Credit column. (As you add line items, the amount to balance will appear in the column that requires it.)

After setting up a transaction as given in the instructions above, you can make changes:
To correct a mistake, simply return to any transaction line and edit it.
To remove a line from this transaction, Click the Delete Line button in the ribbon.
To post a transaction, click the Post button in the ribbon. If you attempt to post an unbalanced transaction, a warning popup will appear that prompts you to balance the entry.
An account journal displays the transactions for a specific ledger account, for a specific period of time.
To view an account journal, do the following:
While in the General Ledger, double-click a parent or child account. (Or, click the account and then click the View Journal button in the ribbon.)
Set the date range by choosing both a Start Date and End Date.
Click the Refresh button to see the transactions in this account that fall within that date range.
Manual transactions only: To view only transactions that have been entered manually, check the box at the bottom of the journal window (View manually entered transactions only).
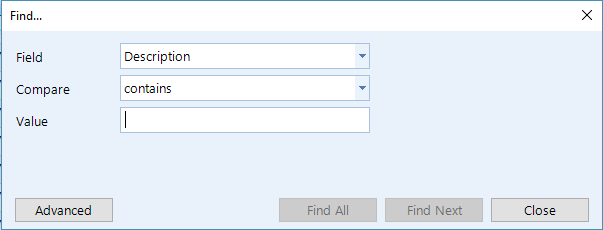
Click the Find button in the ribbon to open a popup and search for transactions. Choose a Field, a method by which you want to Compare your search value and the information in the transactions, and the Value for which you are searching. Click Find All or Find Next to display transactions that match your search criteria.
Follow these steps to print an account journal, either to a PDF, and Excel file, or a paper printout.
Click the Print / Export button in the ribbon to display the popup window.
Check the box for the method of printing that you need, Print, Save as PDF, or Export to Excel.
Set the date range by choosing both a Start Date and End Date.
Next, check the box for each of account journal that you need to print.
To check or uncheck multiple accounts, hold down the CTRL key and select multiple accounts and then click either the Check button or Uncheck button.
Click the Next button and follow any prompts for printing a PDF or saving the CSV (Excel) file.
Click Start to begin the printing, and then click the Close button to close the popup window.