 Bills
BillsIn this article, we explain how to enter bills for expenses and post them to accounts payable.
In the sections below, we explain how to perform these tasks:
Setup a vendor contact
Creating a new bill
Search for an existing bill
Post a bill / Edit an existing bill
Watch the following video as a supplement to reading this article:
In Shop Manager, a bill originates with a supplier. To post supplier bills onto a payable account, it is first necessary to setup a supplier contact.
Follow these steps to create a biller contact:
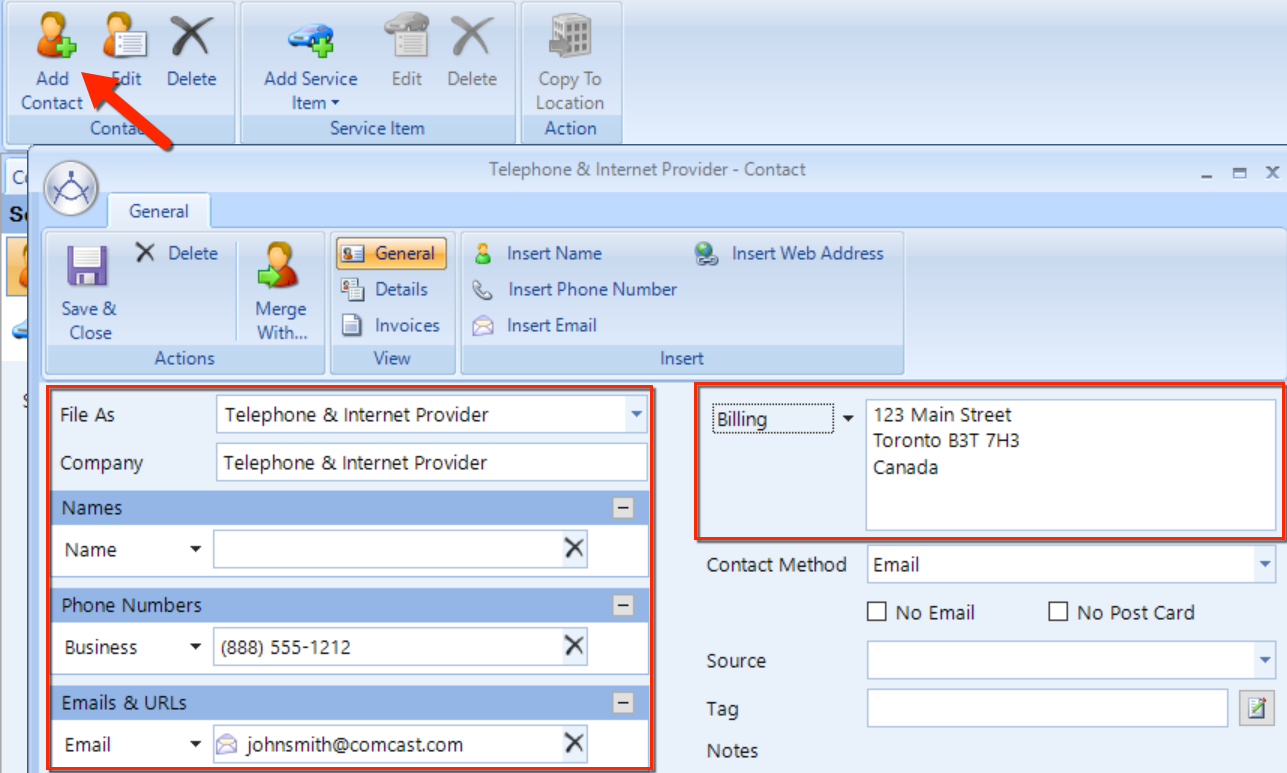
Click the Contacts button in the Home ribbon, and then click the Add a Contact in the Contacts ribbon.
In the Contact window, enter the Company name, contact Name, Business Phone Number, and Email address. An example is given in the figure below.
Enter a Billing address, and optional make other entries in this form.
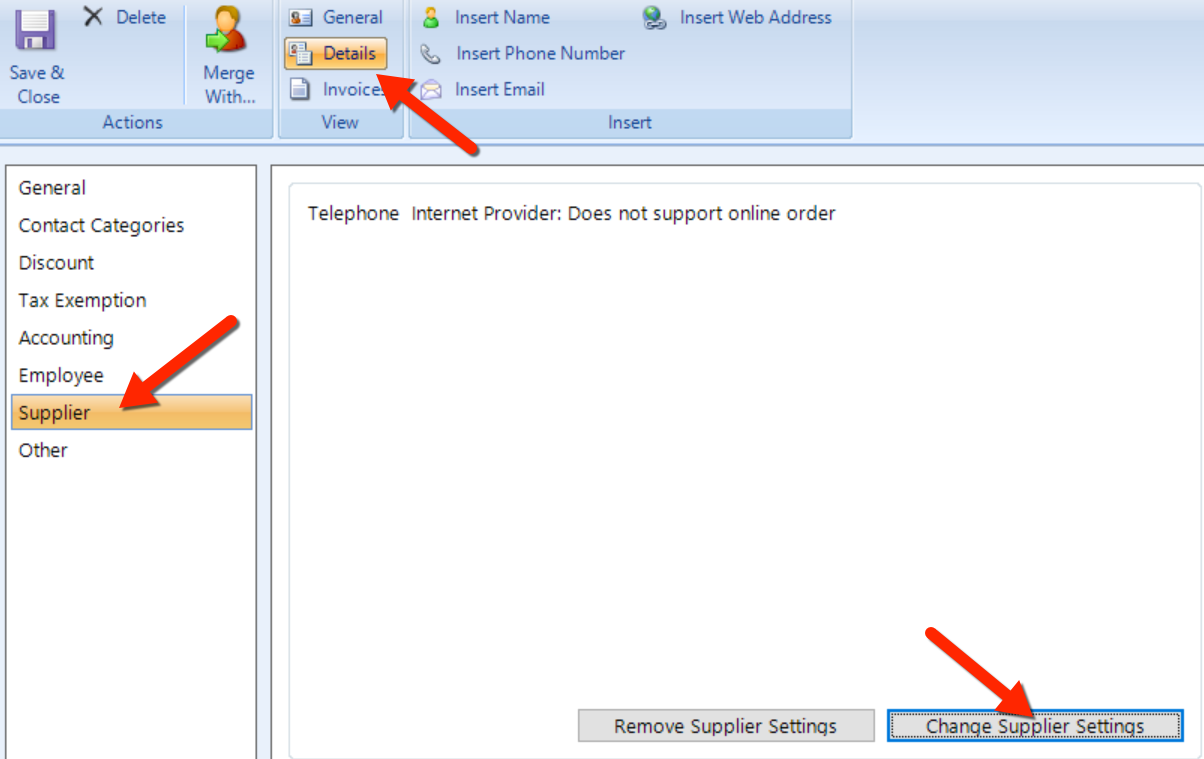
Next, let's configure this contact as a non-parts supplier. Click on the Details button in the ribbon.
Click Supplier in the left window pane, and note the message indicating that this contact does not support online orders. This is typical for any supplier with which you have not integrated online ordering.
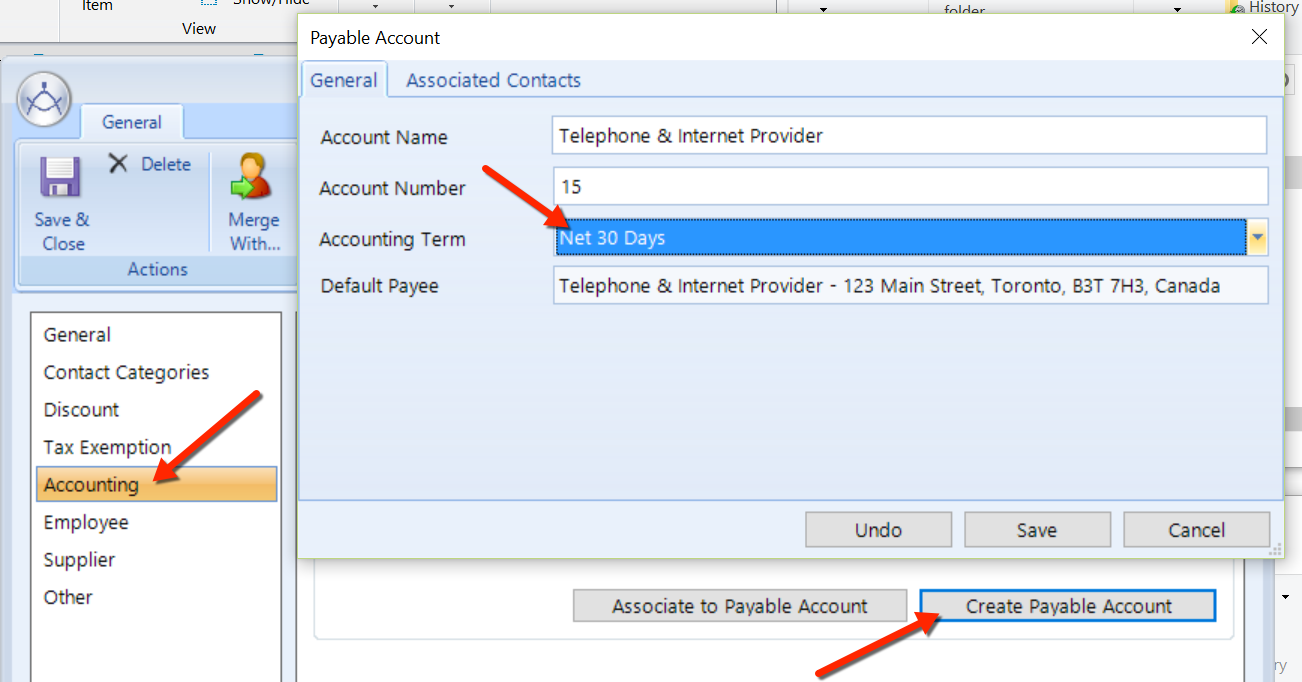
Once you add the contact as a supplier, you will be prompted to create a payable account. Choose Yes to create the payable account. Continue with the steps below.
In the Payable Account pop-up, you'll see that the Account Name and Account Number are pre-populated. Optionally, you can change either of these values.
Choose the Accounting Term from the drop-down list, which is commonly Net 30 Days for a biller.
Click the Save button to return to the Contact window, on which you'll see that the button label beneath Accounting now reads Payable Account Settings to indicate that this contact has a payable account.
Click the Save & Close button in the ribbon to commit your changes and add the contact.
The Bills feature is found within Purchases. Follow these steps to create a bill:
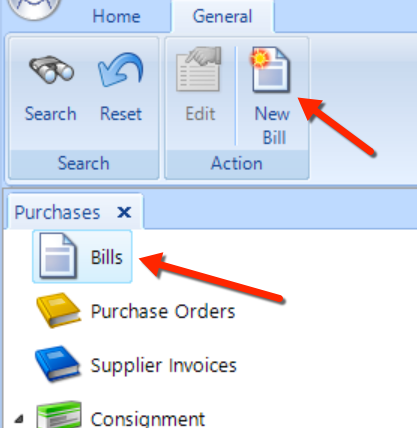
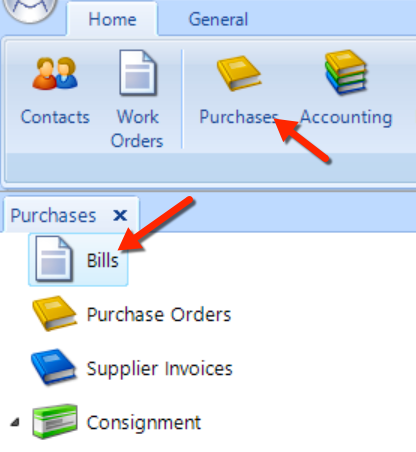
Click the Purchases button in the ribbon, and then click Bills in the left window pane.
As shown in the figure below, click on the New Bill button in the Purchases ribbon.
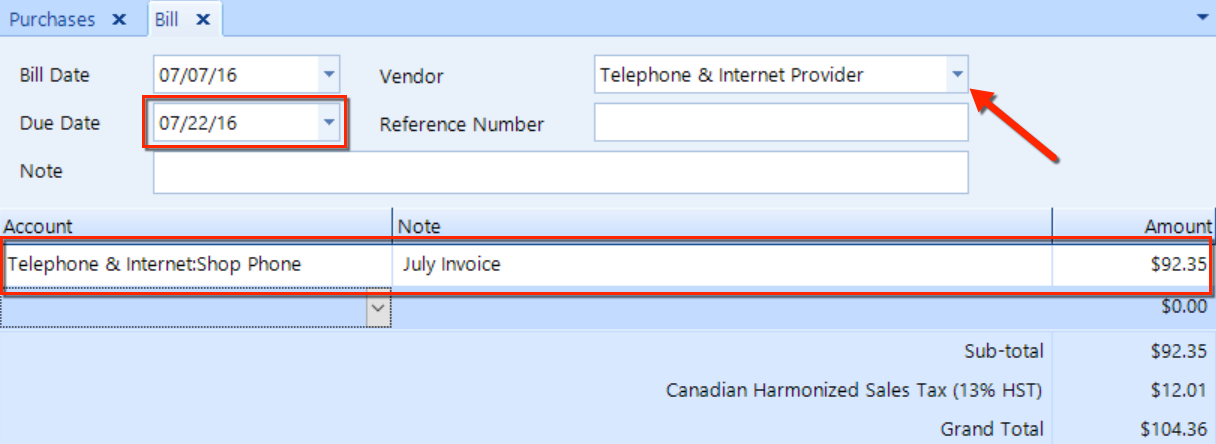
Choose a Due Date for the bill, and also choose the Vendor. See the figure below for an example.
Optionally, enter a Reference Number.
In the Account drop-down, choose the applicable expense account as the payable account.
Enter a Note that describes the bill, and then enter an Amount. (Any applicable taxes will automatically calculate along with the Grand Total.)
If this bill consists of multiple lines items, click the Add button in the ribbon.
To make tax adjustments, click the Tax Adjustment button.
If you're not ready to post the bill to the account, click the Save button. Otherwise, click the Post button to return to the Purchases window.
Much like searching for supplier invoices, you can search for a specific kind of bill–such as a bills from a particular supplier that fall within a date range.
Let's search for the bill that you created above:
Click the Purchases button in the ribbon, and then click Bills in the left window pane (as shown in the figure below).
In the main panel, choose Telephone & Internet from the Vendor drop-down. See the fifgure below.
Choose a Start Date and End Date that are likely to contain the bill in question. For our example, we set the dates to cover the month of July 2016.
Since we did not yet post the bill, it will have a status of Not Posted. So choose that option from the Status drop-down.
Click the Search button to display the results.
In the next section, we'll continue this example and explain how to modify this bill.

After searching and locating a bill–as we explain in the previous section–you can edit the bill and make changes to it. As a continuation of the example in the previous section, follow these simple steps
Search for a bill, as we explain in the previous section.
After locating the bill you want to edit, double-click on that item in the Bills results listing (see the figure above).
If necessary, click the Add button in the ribbon to add a line item to the bill.
Should a tax adjustment be necessary, click the Tax Adjustment button to open a pop-up window. Check the box(es) for applicable taxes and click he OK button to return to the bill details.
Continuing our example from the previous section, let's go ahead and post this bill by clicking the Post button in the ribbon–as we show in the figure below.
Click the Yes button to confirm that you want to post this bill to accounts payable.
Other options: Looking at the other options in the ribbon, you can send a copy of the bill in an email message, print the bill, or export it to a PDF file.
