 Items to be Returned
Returned items are material items and cores that will be sent back to the supplier for credit. After sending an item back to a supplier as a return, it's important to mark the item by adding it to credit slip–which will remove the item from the returned items list.
Watch the following videos as a supplement to reading this article:
You access the return items feature by clicking the Purchases button in the ribbon, and then clicking Returned Items in the left panel.
Follow these steps to search for all returned items for a particular supplier:
Access the Returned Items feature as we explain above.
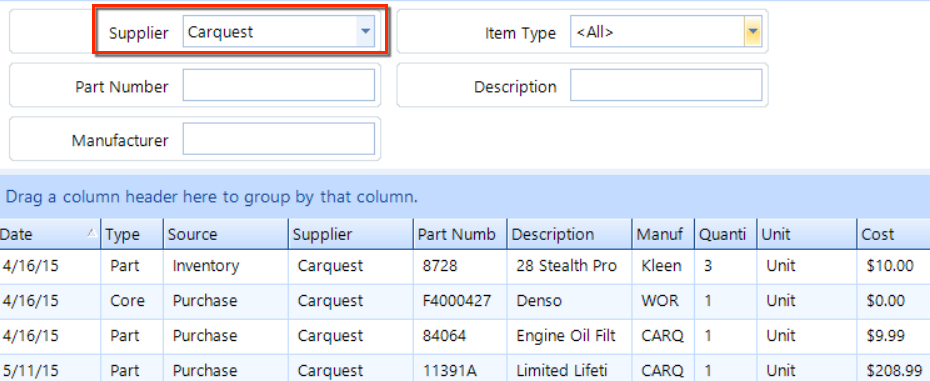
Choose a supplier from the Supplier drop-down .
You can restrict the search further by making entries for the other search terms.
Click the Search button in the ribbon at the top to display a listing of items, much like the figure below.
Double-click to review the details of the item (or click the Show Item Detail button in the ribbon).
Items that appear in this returned items listing may be the result of one or more these actions:
items removed from a work order after being received into inventory (or received on a work order)
items sold from inventory with a core status that has been set to returned
items returned from inventory
items returned while receiving

If you have an item to return that doesn't appear in the search results, you can manually add the item.
Follow these steps to manually add an item to be returned:
In the ribbon, click the Add Found Item.
Enter a Part Number, Description, and Manufacturer.
Enter a Quantity and Cost, and optionally a Core amount.
Choose and Adjustment Account, such as Supplier Invoice Adjustments or Inventory Adjustments.
Click the OK button and check the search results to verify that this item appears as a found item.

If an item has been lost, you can delete it from the returned items list.
Follow these steps to delete an item from the returned items listing:
Search for the item, as we explain at the beginning of this help article.
In the ribbon, click the Delete Lost Item button.
Click Yes to confirm.
You may decide that you want to keep an item that appears in the returned items listing.
Follow these steps to move an item back to inventory:
Search for the item, as we explain at the beginning of this help article.
In the ribbon, click the Move to Inventory button.
Click Yes to confirm.
You may decide that you want to keep only some of the quantity for an item that appears in the returned items listing.
Follow these steps to return only some of a specific item marked for return:
Search for the item, as we explain at the beginning of this help article.
In the ribbon, click the Split Item button.
In the pop-up window, change the Quantity.
Click Yes to confirm.
When returning an item, you create a credit slip. At this point, you will not have received an actual credit for the item(s), but you'll probably have a reference number to identify the return.
Follow these steps to return an item and create a create slip:
Search for the item, as we explain at the beginning of this help article.
In the ribbon, click the Create Credit Slip button.
In the pop-up window, confirm the Supplier and enter your return reference number in the Credit Slip # field.
Click Yes to confirm.
The items will move off of the Returned Items listing and onto the Returned Item Credit Slips listing.
Typically, the supplier will send you a credit invoice to acknowledge your return.
Follow these steps to process a credit slip from a supplier:
Click on the Returned Item Credit Slips item in the left panel.
Search for the Credit Slip number, as we explain at the beginning of this help article.
In the ribbon, click the Edit button to display the details of the credit slip.
You can remove items from the credit slips by using the Remove button in the ribbon.
Click the Edit button to change the credit slip number of supplier.
If necessary, you can apply Adjustments and Tax Adjustments in the same way as for Supplier Invoices.
With the buttons in the ribbon, you can also print, email, or export the credit slip to a PDF.
Often, the credit slip / invoice will have a different reference number. If so, click the Credit Slip Number button in the ribbon and enter the new number (or append the new number to old one and separate each by a comma or slash).
To post this credit slip, click the Post button in the ribbon, choose the payment method you will receive the credit and then click OK.