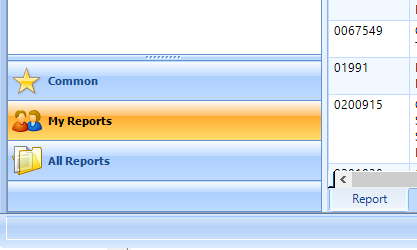
Shop Manager includes a large variety of reports, in two main categories:
Common – a collection of common shop reports
My Reports – reports that you customize and save
All Reports – a categorical listing of all the reports available in Shop Manager

Watch the following video as a supplement to reading this article:
In this article, you'll find information on:
Customizing a report
Removing and adding columns
Sorting
Grouping
Sub-grouping
Clear the sorting or grouping
Context menu
Print or export a report
Saving a report
These are the basic steps for customizing a report:
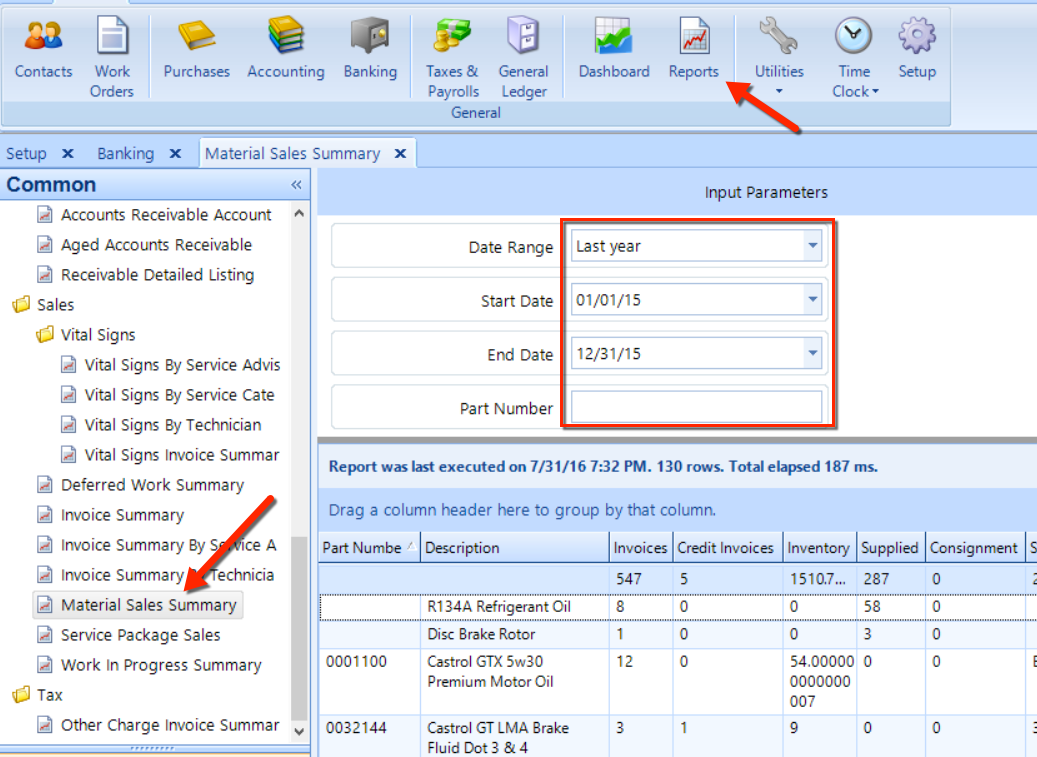
Click the Reports button in the Home ribbon.
In the Common panel on the left side of the screen, locate a report and double-click it. For example, double-click Common > Sales > Material Sales Summary. See the figure below.
Choose a Date Range, or choose a Start Date and End Date.
Optionally, enter information in the other fields in the Input Parameters panel. For the Material Sales Summary report, you can also enter a Part Number as another search parameter.
Click on the Execute button in the ribbon. Any matching results will appear in the listing, much like is shown in the figure below.
You can remove columns to simplify a report. Click the Column Chooser button in the ribbon to display the choose pop-up, then uncheck the boxes of the columns that you want to remove (see the figure below).
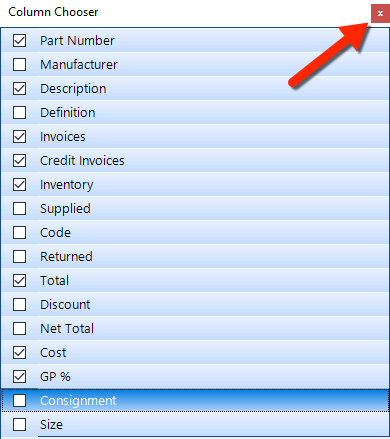
After confirming that the Column Chooser reflects your choices, click the small X button in the upper right corner to close the pop-up.
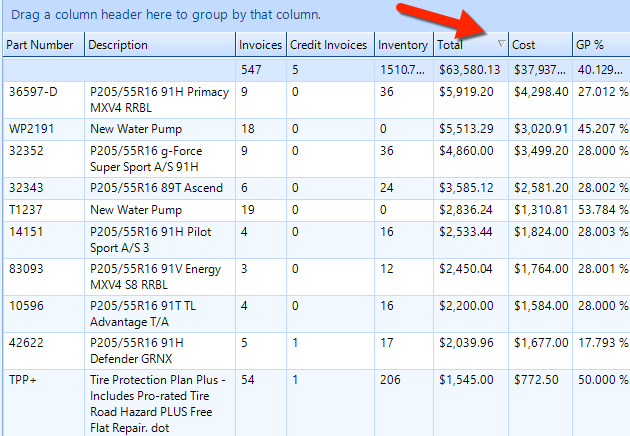
Sort on any column of data by clicking on it. Click the column again to reverse the sort on that column.
Here we see a reverse sort on the Total column, which lists the highest values at the top:
You can also group the rows of a report on one or more columns.
To illustrate, let's continue with the Materials Sales Summary report example from previous sections:
First, use the Column Chooser to add the Manufacturer column back onto the report.
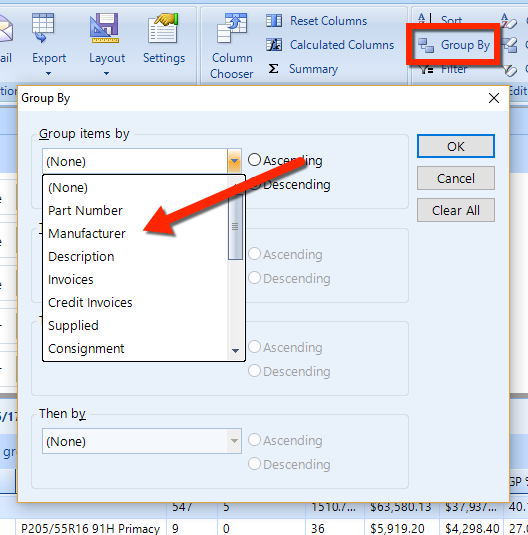
Click the Group By button in the ribbon.
Choose Manufacturer from the first column drop-down (see the figure below), and then click OK.
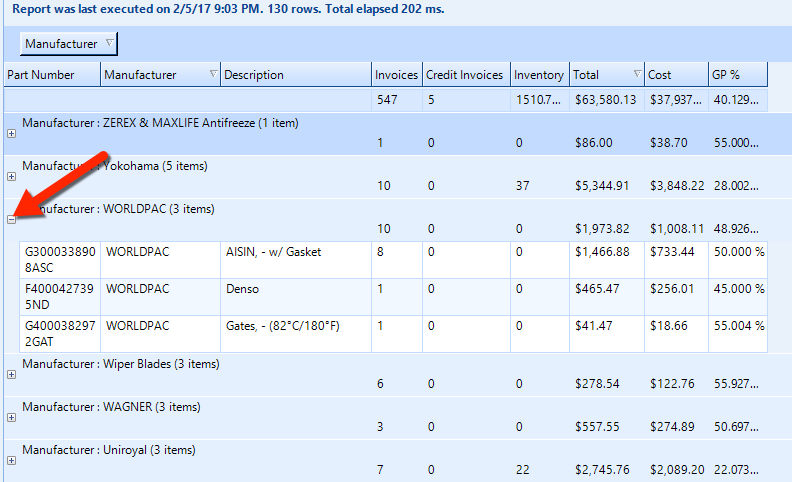
The report will change slightly in appearance to hide individual items that belong to the same value in the grouped column. As shown in the figure below, we have a grouping by Manufacturer. You can click one of the small + buttons to reveal the items that roll up under a particular manufacturer.
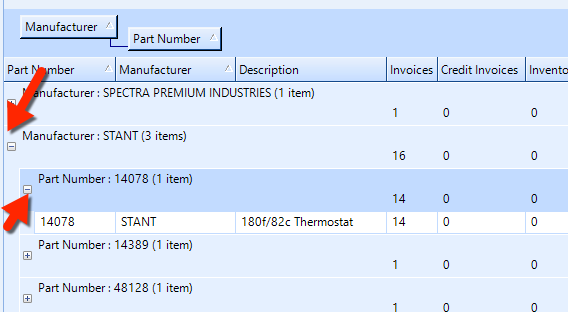
You can also group on one or more columns by drag-and-drop a column heading into the area immediately above the headings (see the figure):

You can add additional columns to the grouping. For example, you could drag both the Manufacturer and Part Number columns into the grouping bar (as shown in the previous section).
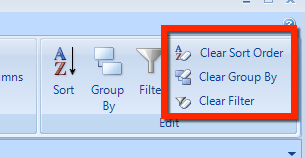
Use the buttons on the far-right of the ribbon to clear all grouping and/or clear the sorting and return to the default sort.
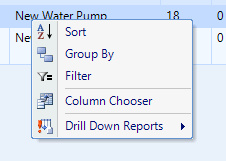
Right-click over the report listing to see that some functions are available in the context menu, as shown in the figure below.
From the ribbon (see the figure below), you can also perform a variety of printing and export functions:
Export the report to a PDF
Export the report to an Excel spreadsheet
Export the report to another file format
Send the report to an email address
Print the PO
Change the print settings

You can save the report with a customized layout–either to the existing report or by saving a variant of the report into My Reports.
Save to existing report: To save the layout to the existing report, click the Layout drop-down button in the ribbon, and then click Save Layout.
Save to a variant of the report: To save the layout a separate variant of the existing report, click the Layout drop-down button in the ribbon, and then click Save Layout As to display the pop-up window. Enter a unique name for the report, such as "Material Sales Summary - Simplified". Optionally, you may want to change the Description. Check the Save Parameter Values box to save the input parameters that you may have specified. Then click OK.
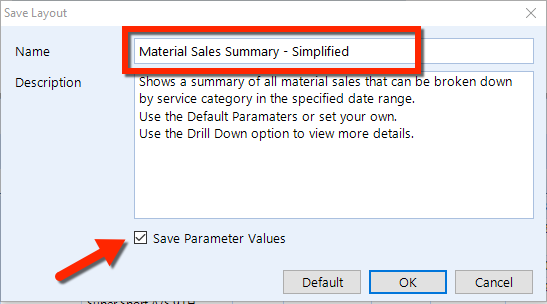
This report can be found in My Reports under the same category. For the Material Sales Summary, you would find it under My Reports > Sales having the name that you have given it.
To see more advanced features, continue on to the Advanced Report Features article. There, you'll find explanations for additional report features such as Calculated Columns, summaries, and Filtering.