An employee is a contact that works in your business, and the contact record contains additional detail that pertains to their employment.
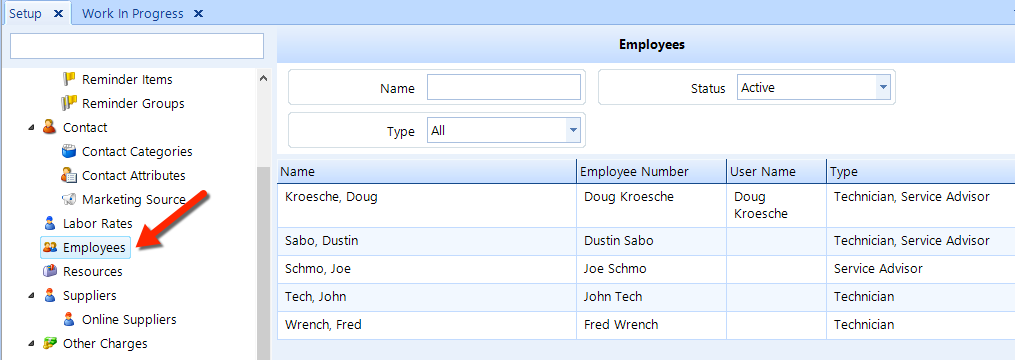
To access the Employee setup feature, click on the Setup button in the ribbon, then locate and click on the Employees item beneath the Location Setup node in the left window pane. See the figure below.
There are two ways to add an employee:
Add an employee through the Contacts feature. Create a contact and then and then edit employee details (click the Details button in the ribbon and then edit details in the Employee section).
Alternatively, you may create a new employee that is not an existing contact. First access the Employees feature as given in the instructions above, then click the Add button in the ribbon. Proceed through the wizard to create a new contact and enter the details for the employee.
Follow these steps to search for an employee:
Access Employees using the instructions given above.
Enter search criteria in the Name field.
Select the employee Status from the drop-down list.
Select the employee Type from the drop-down list.
Click on the Search button in ribbon.
Follow these steps to search for an employee:
Search for the employee using the steps above.
In the listing, click on the employee you need to edit.
Click on the Edit button in the ribbon to open the Employee popup.
Check the Employee box if the contact is an employee, and enter an Employee Number/
Enter the Title and Department for the employee. If applicable enter the name of the supervisor in the Reports To field.
Security Login: match the employee security profile with the Shop Manager security by clicking the find (binoculars) button. Alternatively, you can click the delete (X) button to remove the linked security profile. If a user login for an employee has not already been created, then navigate to user security and configure the appropriate permissions. Then, navigate back to employee setup and match the employee with security login as given in the explanation above.
Check the Technician box if the employee is a technician, then enter a Display Name for this technician that will appear on work orders, work in progress, and reports (some shops number their technicians so the number can be used as their display name instead of their real name). If you don't enter a display name, the employee name will be appear by default.
For reporting purposes, enter a Rate to use for the labor cost calculation. This rate should be an estimate of the technician’s hourly costs to the company, so it should include a build up of any other costs in addition to the technician's base labor rate–such as benefits. Labor cost is calculated by multiplying this rate by the billed time, and will be used in sales reports anytime there is a labor cost estimate.
| REMEMBER: If you enter a rate on one technician, then you must enter it for all technicians–or your reporting will be inaccurate. |
Check the Service Advisor box if the employee is a service advisor, then enter a Display Name for this advisor that will appear on work orders, work in progress, and reports (some shops number their Service Advisors so the number can be used as their display name instead of their real name). If you don't enter a display name, the employee name will be appear by default.
Click OK to save.
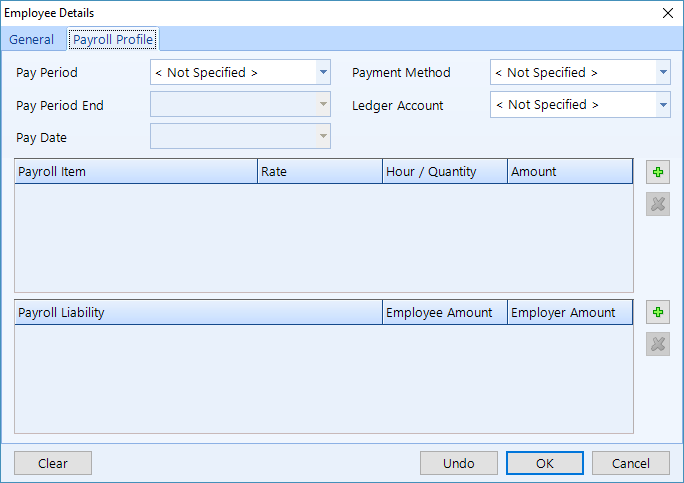
Within employee details (see the previous section), you'll find a Payroll Profile tab–as shown in the figure below. Using this profile, the bookkeeper can setup a template payroll entry for each employee to reduce duplication on regular pays. In a payroll profile, a user can specify the typical pay period–a period end date and pay date which is used for calculation going forward based on the selected pay period.
In addition, all other aspects of the regular pay entry can be configured in the payroll profile, such as payroll items, payroll liabilities, payment method, and the ledger account. After saving a payroll profile and performing the next payroll, the scheduled payroll entry form will be pre-populated with the figures from the payroll profile.
| NOTE: Employee details and payroll profile are also accessible from Payroll by selecting an employee and clicking the Edit button in the ribbon. |
Instead of deleting an employee (as given in the instructions in the next section), you can simple set an employee as inactive. Edit the employee using the steps given in the section at the top of this article, then uncheck the Employee box.
When searching for employees, you may want to see a list of past employees. To do so, simply choose Inactive in the Status drop-down.
Follow these steps to delete details for an employee:
Search for the employee using the steps above.
In this listing, click on the employee you need to delete.
Click on the Delete button in the ribbon.
Click Yes to confirm you want to delete the employee details.
| NOTE: Deleting employee details does not delete the contact. To delete the contact, follow the instructions in the Delete section of the Contacts article. |