Reminder items are services packages and/or inspections that are applicable to a vehicle and/or service item. A reminder is set to occur at specific time and/or mileage intervals. Reminder items can be customized and not necessarily reflective of the OEM service intervals. Reminder items appear in listings with the item name, the last service date, and the date and/or mileage they are due. As a customer builds history with the shop, successive reminder items will appear and will be relieved/reset after any service packages and/or inspections that correspond to the reminder item are complete. Red flags indicate the item is past due, yellow flags indicate the item is coming due soon, and green flags indicate the item is not due.
To access the Reminder Items setup feature, click on the Setup button in the ribbon, then locate and click on Reminders beneath the Location Setup node in the left window pane. Then click Reminder Items. See the figure below.

Follow these steps to search for a reminder item:
Access Reminder Items setup as given in the instructions above.
In the right window pane, optionally enter search criteria in the Name and Description fields.
Click on the Search button in the ribbon to display a listing of matching results.
Follow these steps to add or edit a reminder item:
Access Reminder Items using the instructions above.
To add a reminder item, click the Add button in the ribbon.
To edit an existing item, search the existing reminder items as instructed above and then click on the Reminder Item you need to edit.
Click the Edit button in the ribbon, and a popup window will appear that contains three tabs: General, Intervals, and Triggers.
In the General tab, enter a name and description. In the Intervals tab, you can add one or more interval types. On the Triggers tab, add inspections and service packages that will trigger the resetting of the reminder interval to indicate that the service has been performed.
Enter or edit the Name of the Reminder Item, and add a Description.
Click on the Intervals tab.
To add a new interval, click the Action drop-down button, then click Add Reminder Interval.
From the drop down list, choose a Type for the reminder item.
For a Periodic type, check the Time Interval box, then enter a value and choose either days or months from the drop down list. Then check the Usage box and enter a number that represents the usage interval (such as miles, kilometers, or hours). See the figure below. Click the OK button to commit your changes.
A periodic interval does not require both Time and Usage. Periodic intervals can be set with either the Time or Usage according to what the reminder item is measuring.

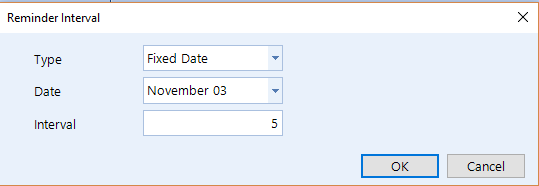
For a Fixed Date type, you set an interval to a specific date each year. From the Type drop-down choose Fixed Date, then choose a particular Date in the next drop-down, and then enter a value for the Interval. Interval simply means how often you wish to perform the service. For example, an interval of 1 corresponds to once a year and an interval of 2 corresponds to every two years. See the figure below. Click the OK button to commit your changes.

To delete an interval, click on the interval you need to delete, click the Action drop-down button, and then click the Remove button.
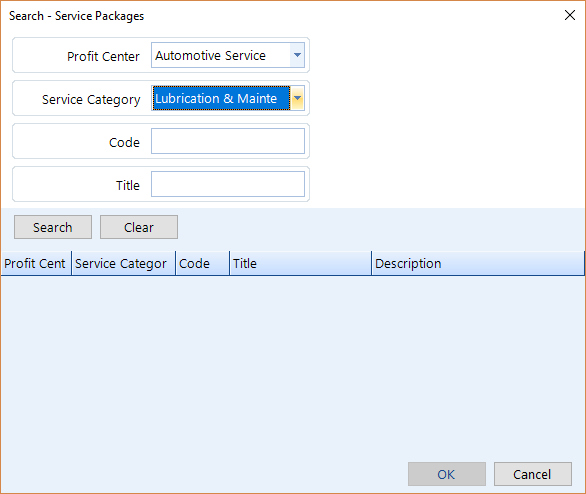
To add a trigger, click on the Triggers tab, then click on the Action drop-down button, then click on Add Service Package or Add Inspection menu item. Select a Profit Center from the drop-down list, select a Service Category from the drop-down list, enter a Code (Optional), enter a Title (Optional), click on the Search button. Select the item from the list and then click the OK button.
To add multiple trigger items simultaneously, hold down the Ctrl or Shift button on the keyboard and click with the mouse to make additional selections.
Repeat the process as necessary to include multiple service packages and/or inspections. Click the OK button.
To delete a trigger, click on the trigger you need to delete, then click the Action drop-down button, and then click the Remove button.

Follow these steps to delete a reminder item:
Access Reminder Items using the instructions at the top of this article, then search for reminder items as given in the instructions above.
Click on the reminder item you need to delete.
Click the Delete button in the ribbon.
Click Yes to confirm you want to delete the reminder item.